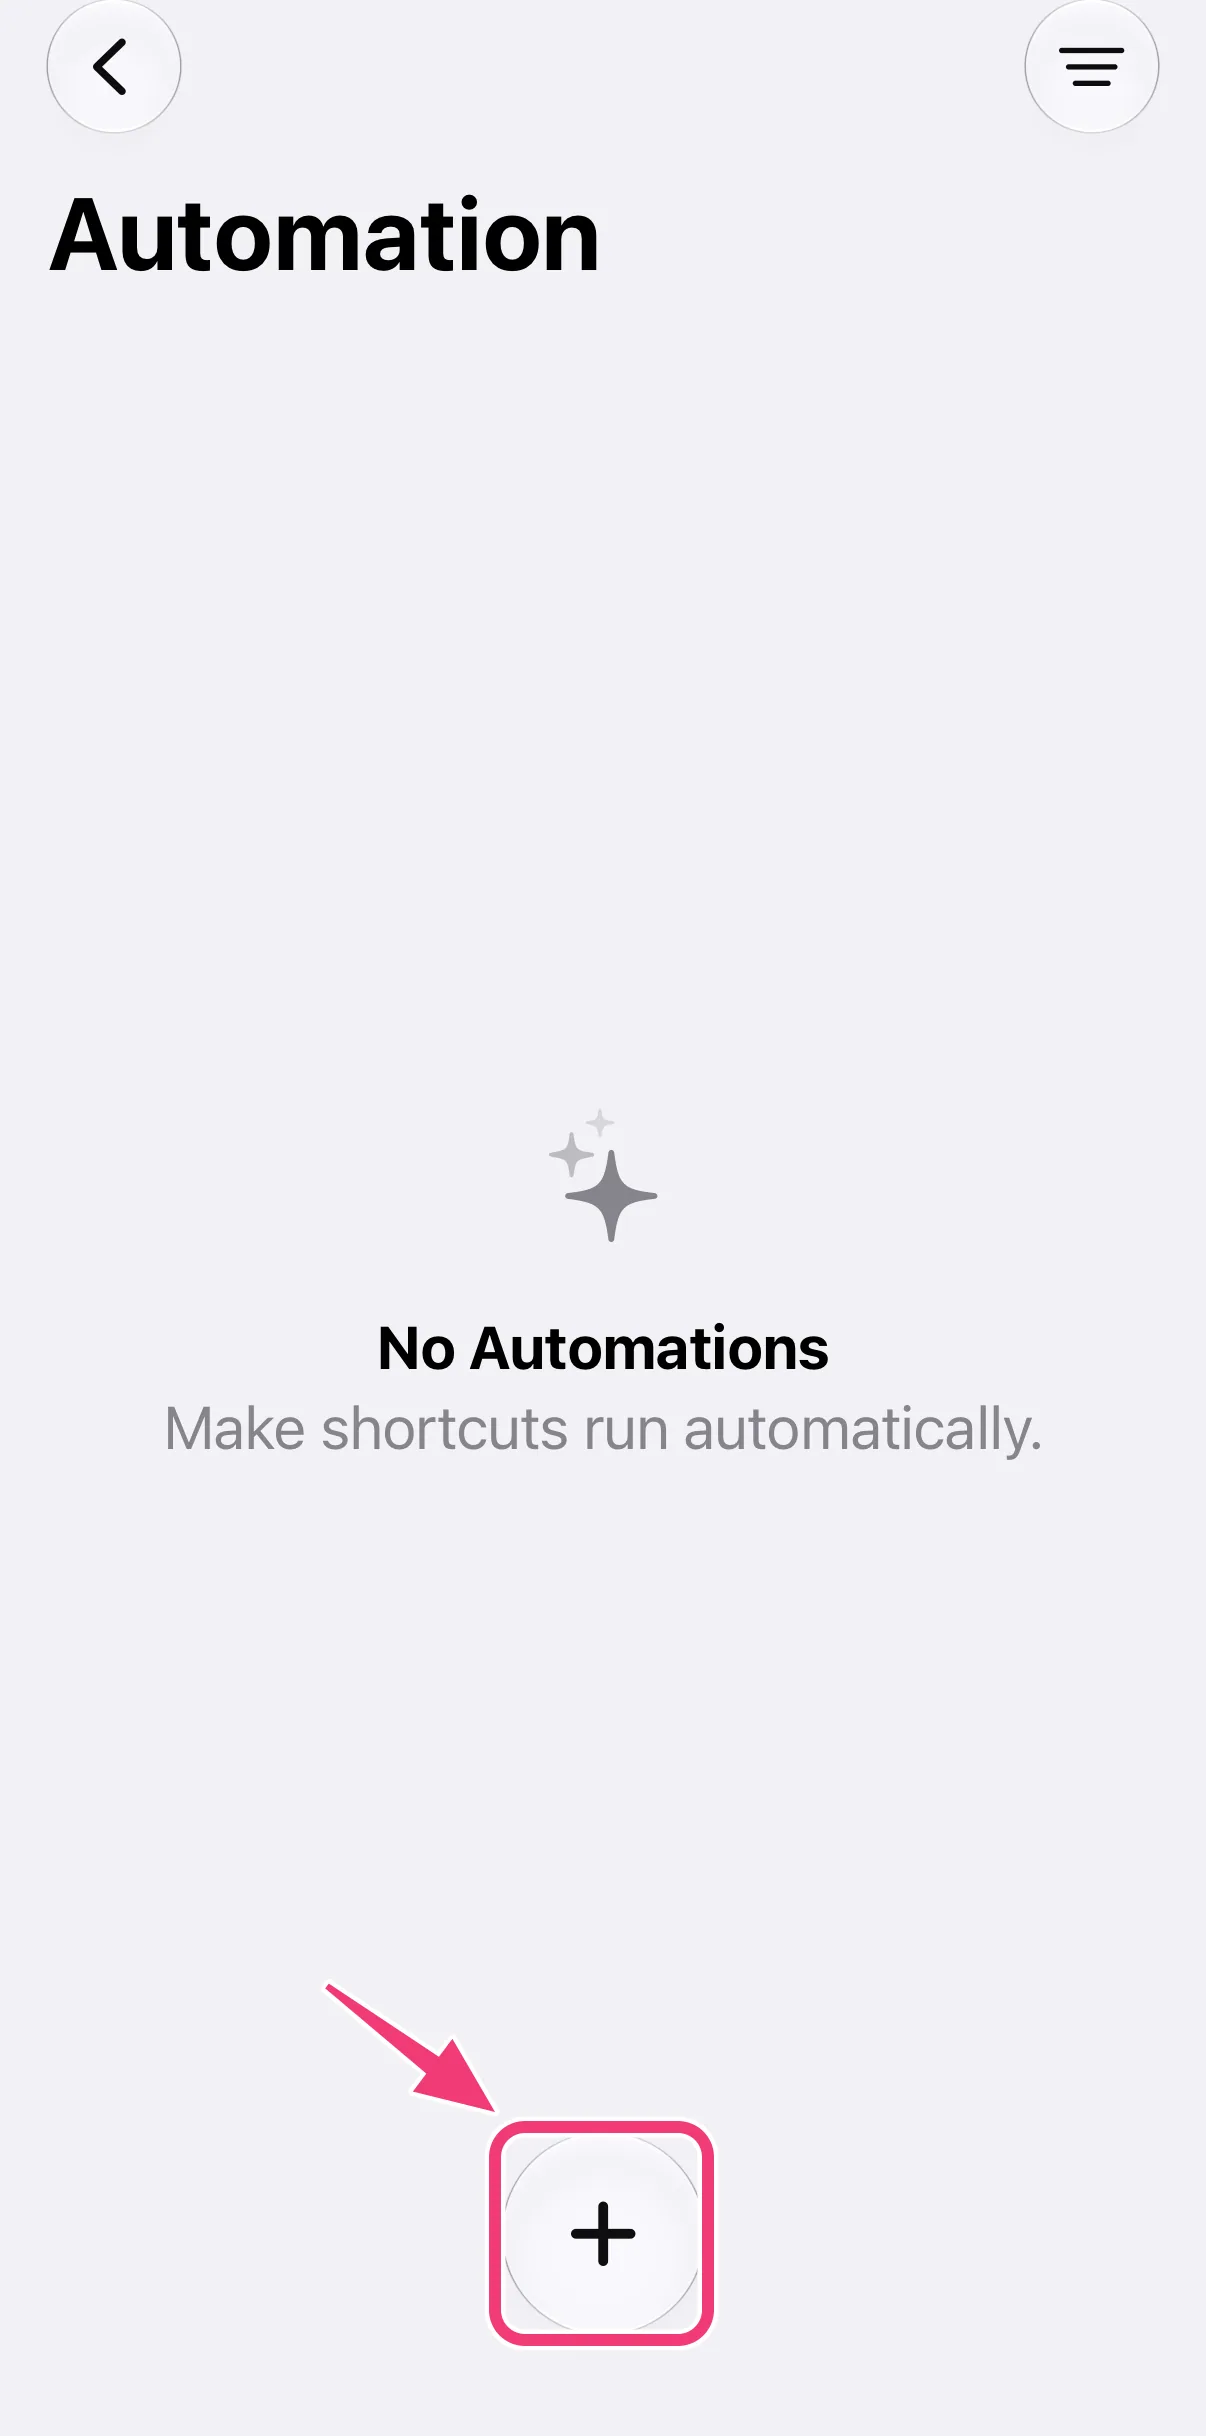
This guide walks you through setting up SMS forwarding to email with the autoforward app and a Shortcuts automation. It assumes that you already have the autoforward app installed. Open the Shortcuts app on your iPhone and go to "Automation" — or tap "Open Shortcuts App" in autoforward, which takes you straight there.
1. Add a New Automation
Tap "+" at the bottom of the "Automation" page.
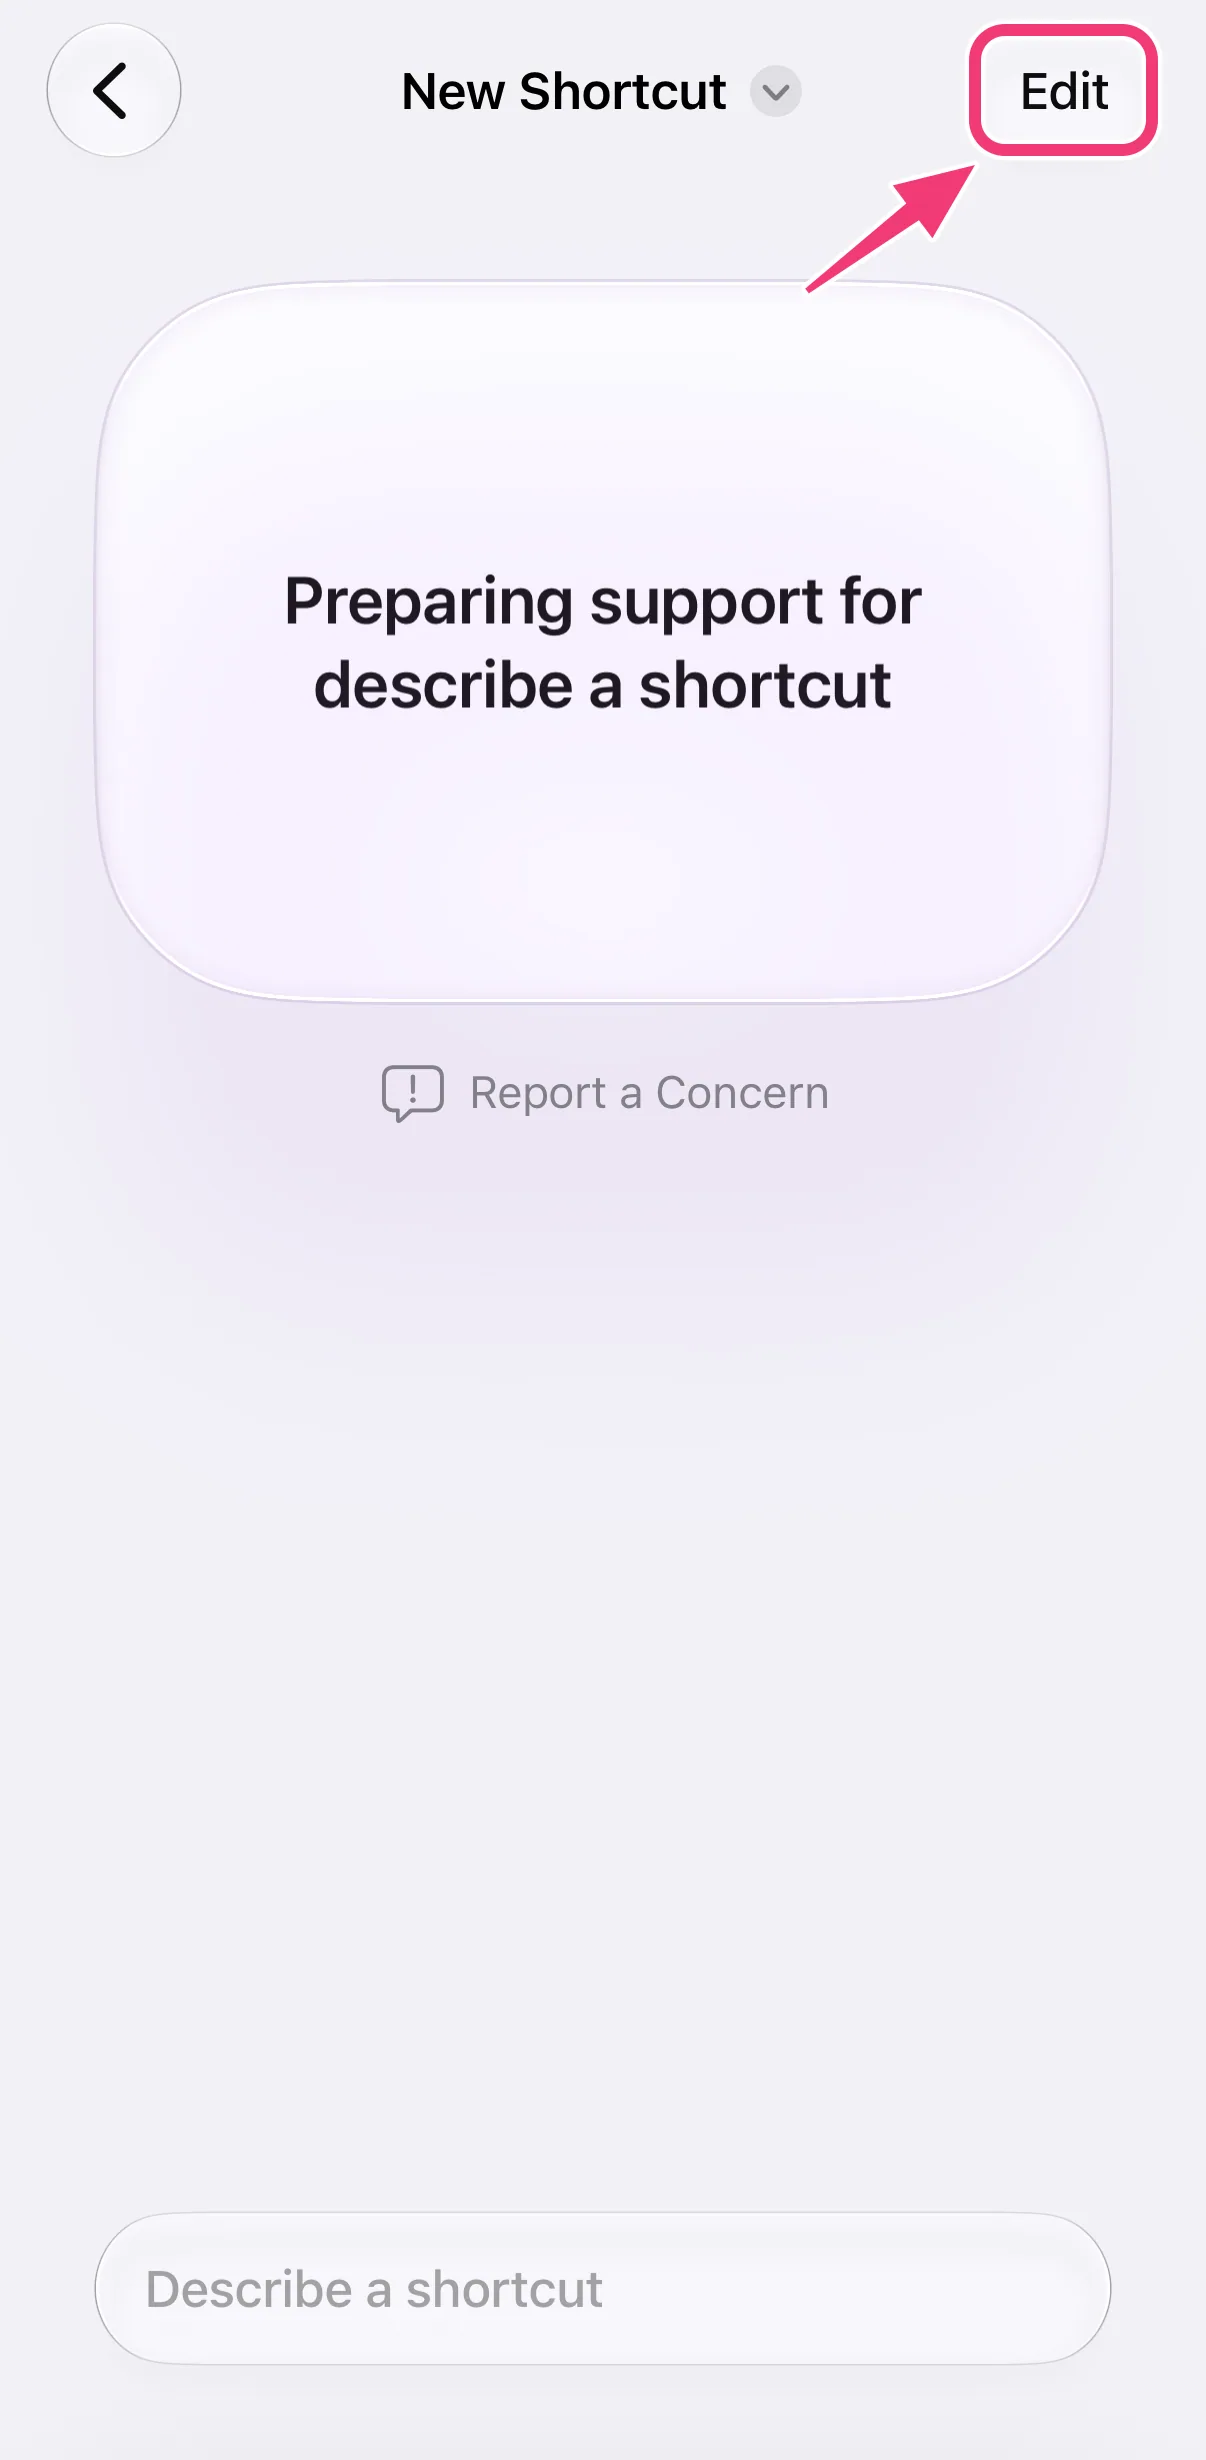
2. Open the Editor
If Shortcuts asks you to describe a shortcut, tap "Edit" (top right). If the editor opens right away, skip this step.
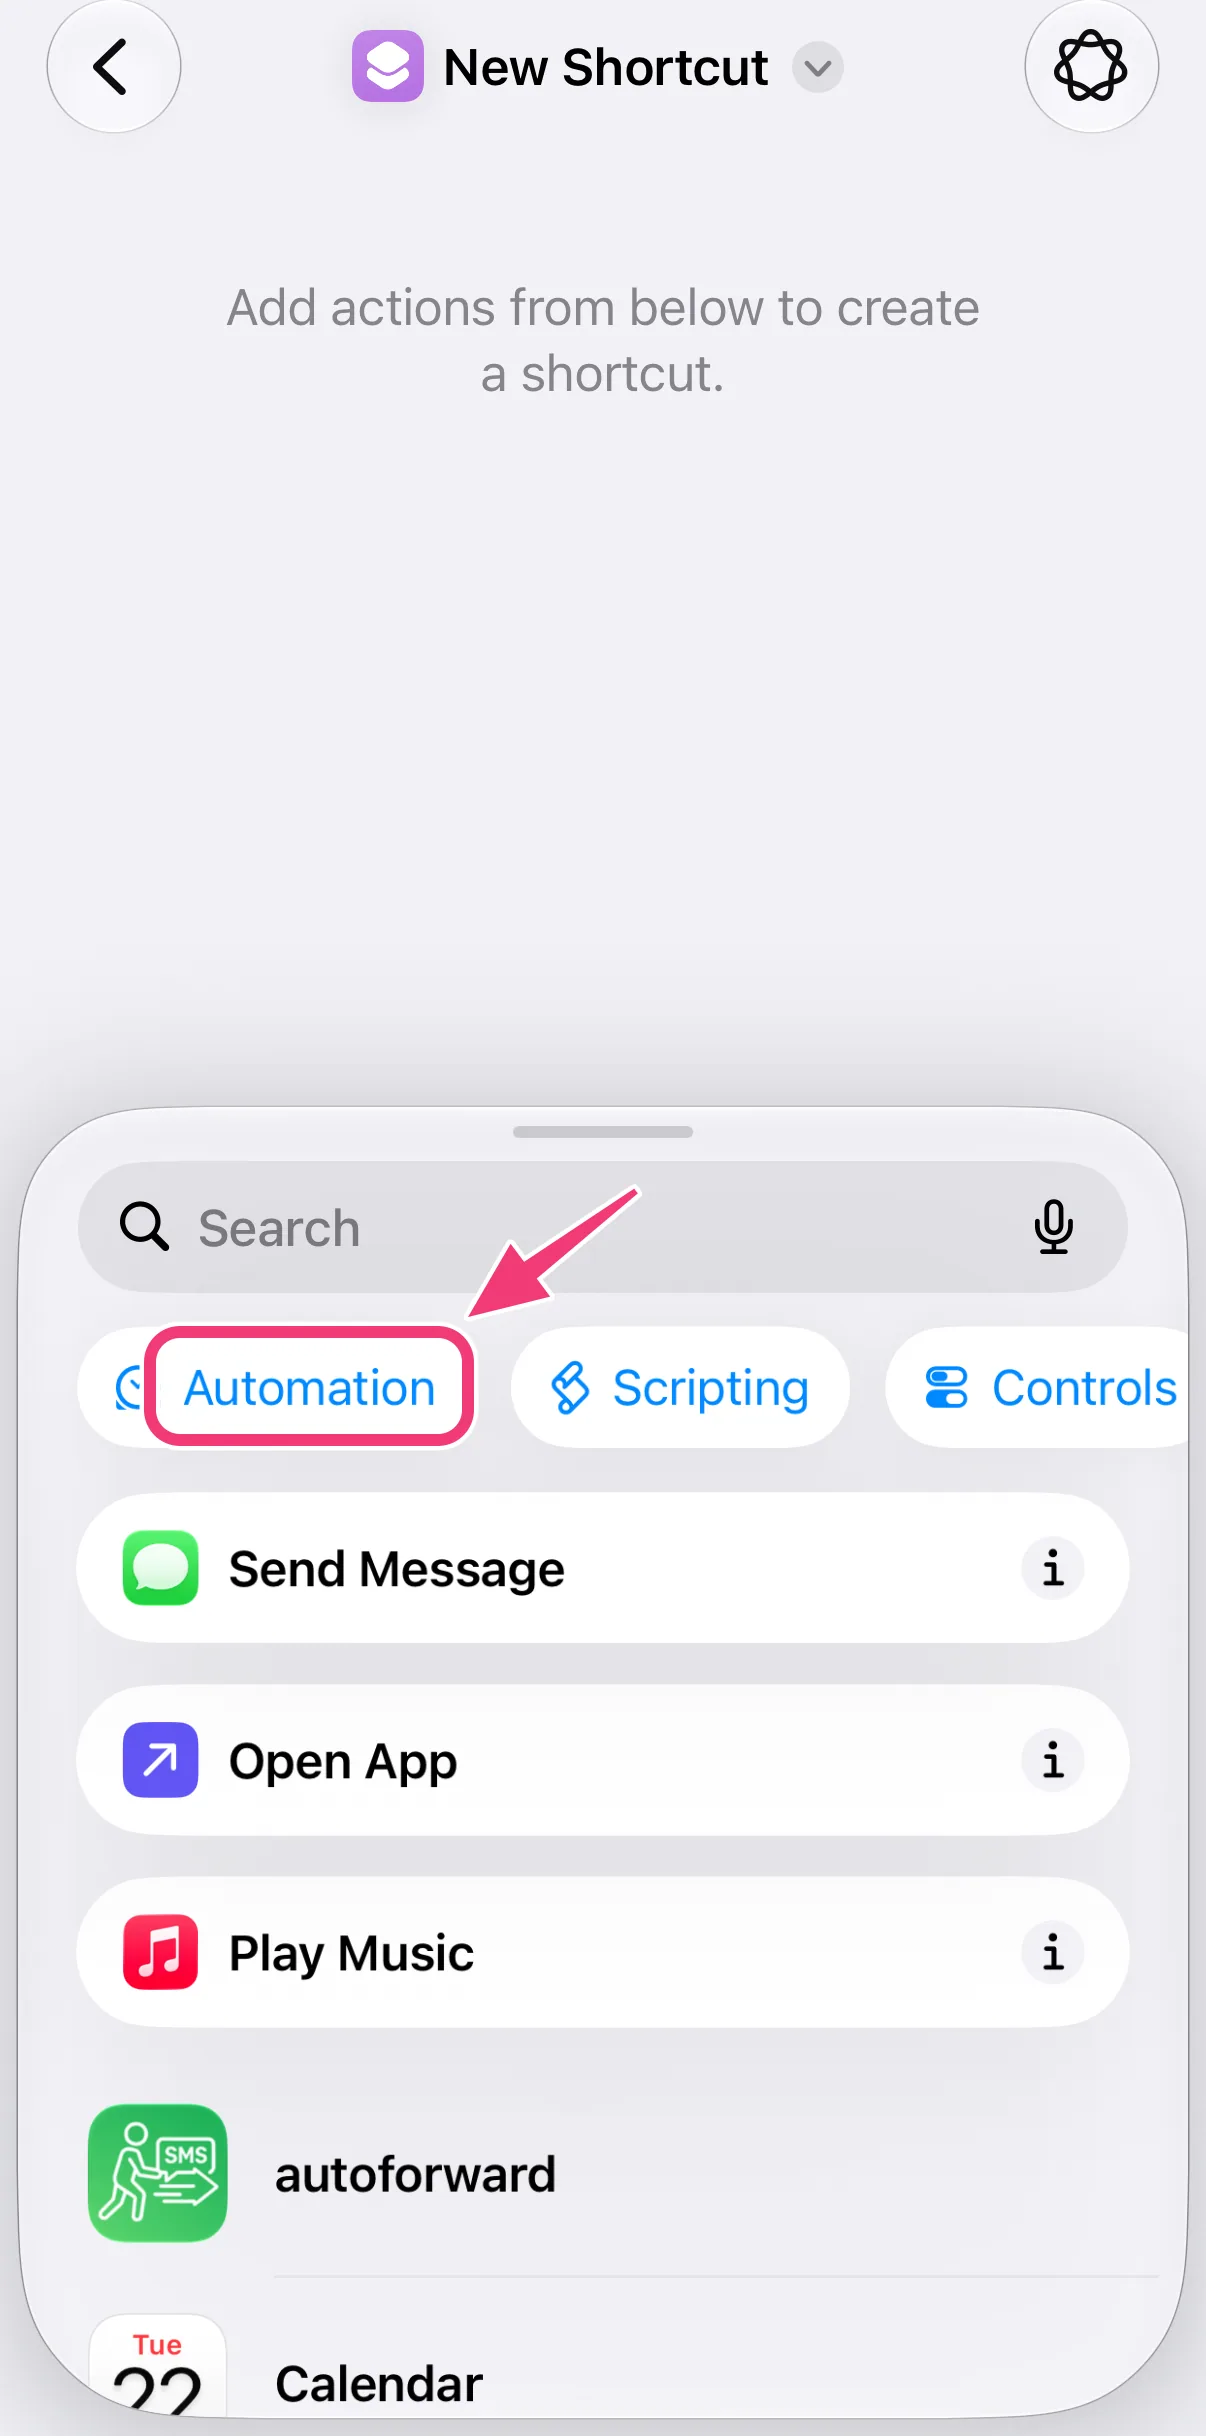
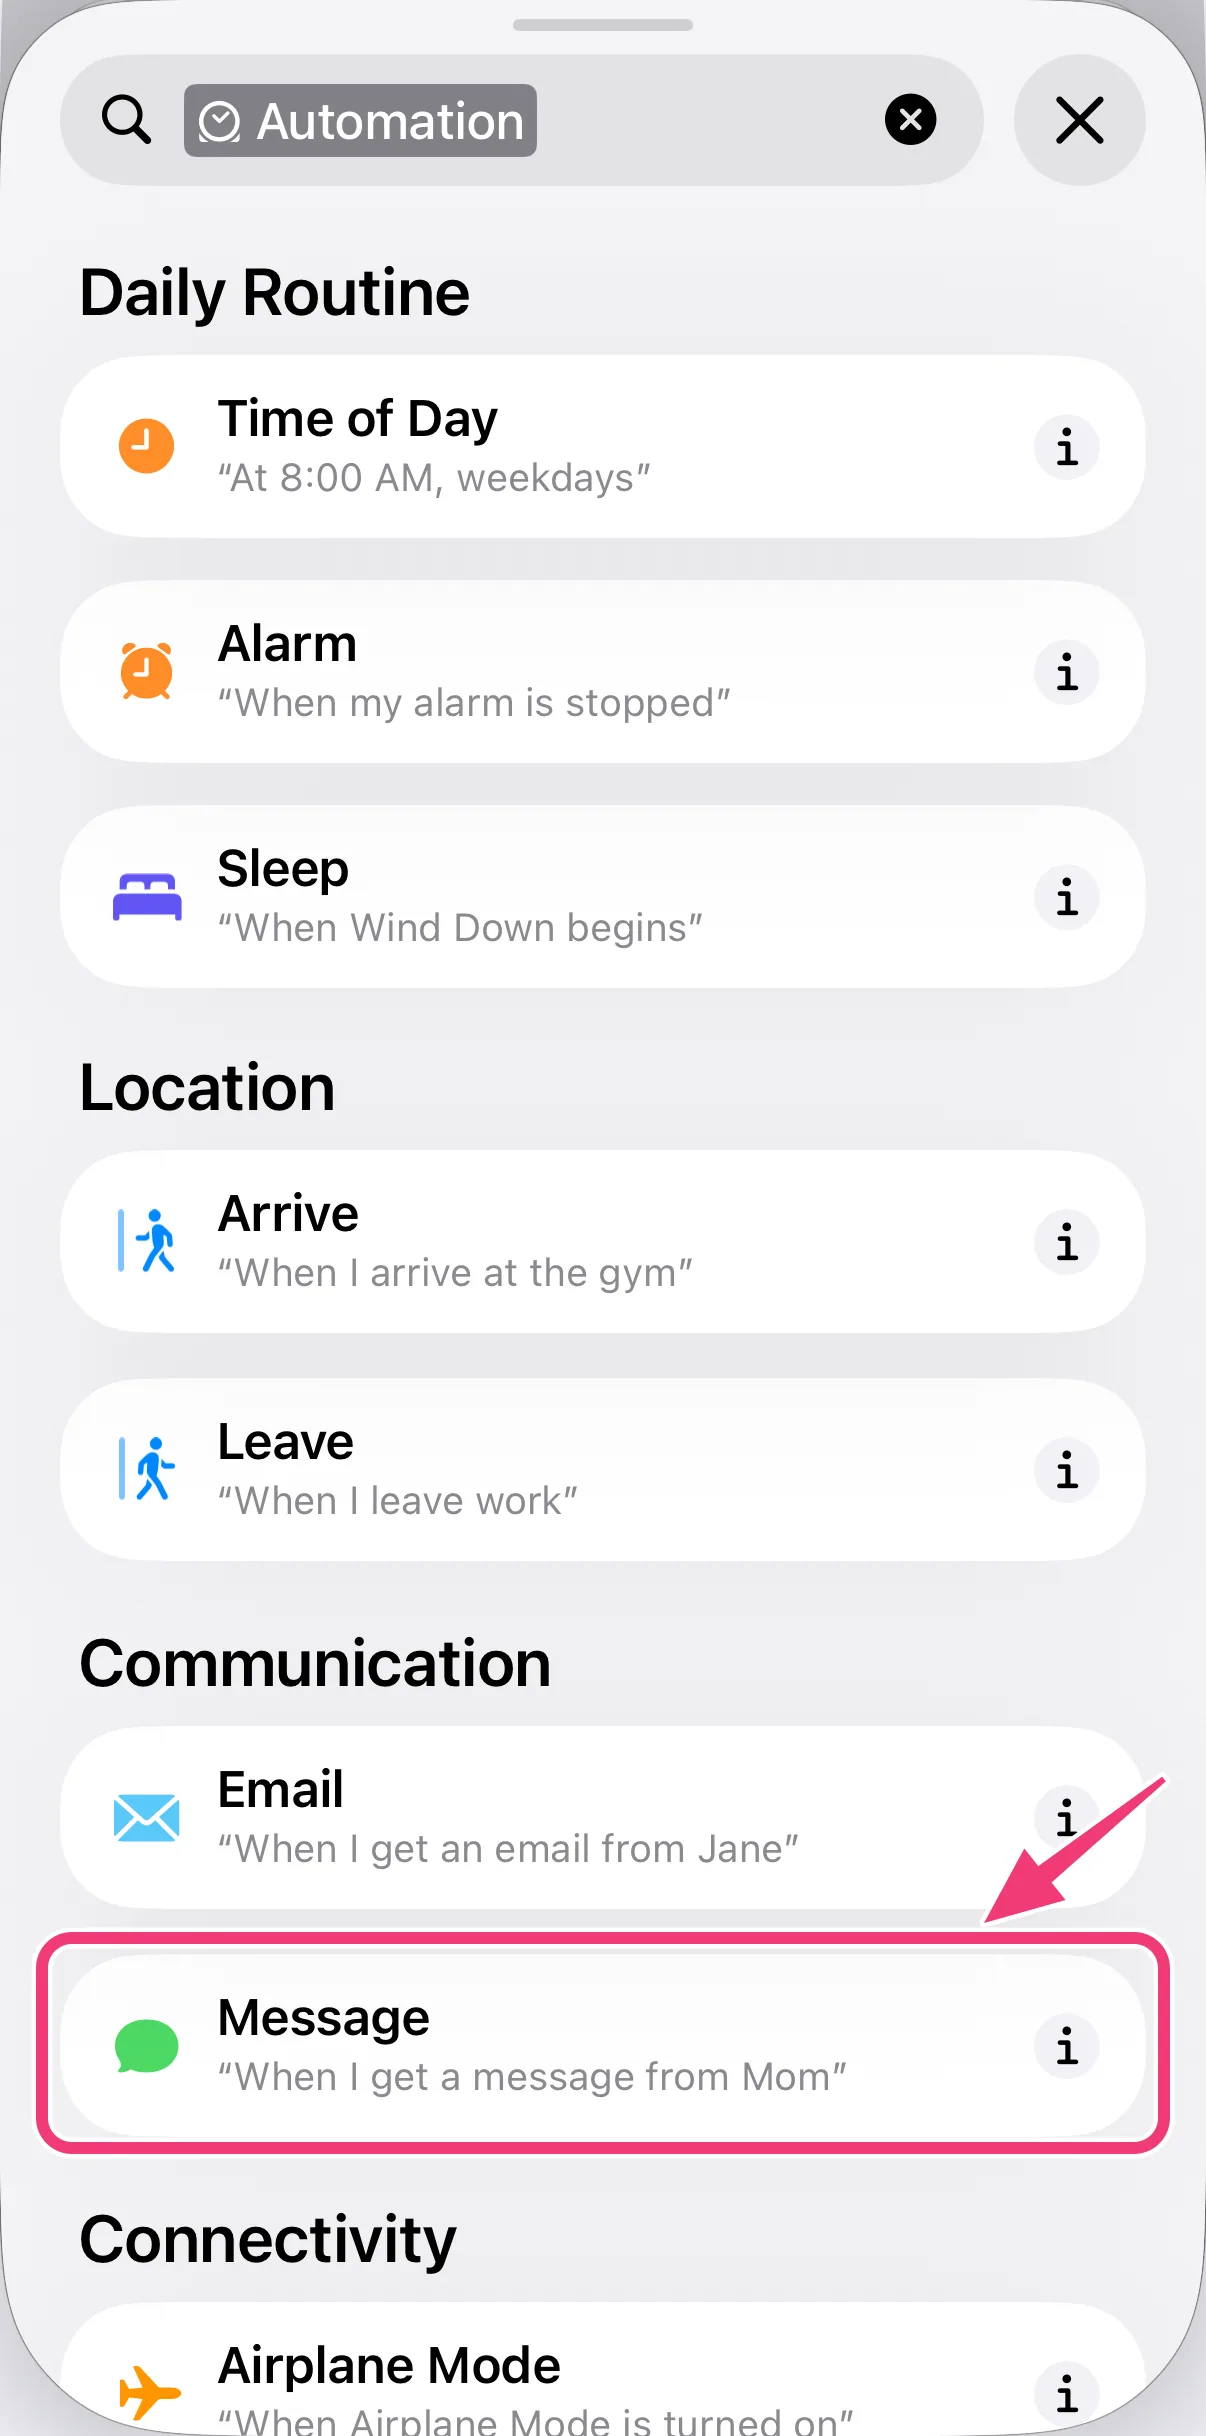
3. Tap "Automation" and Select "Message"
In the list of actions at the bottom, first tap "Automation" — it is easy to miss — then select "Message" as the trigger.
4. Choose Which Messages Are Forwarded
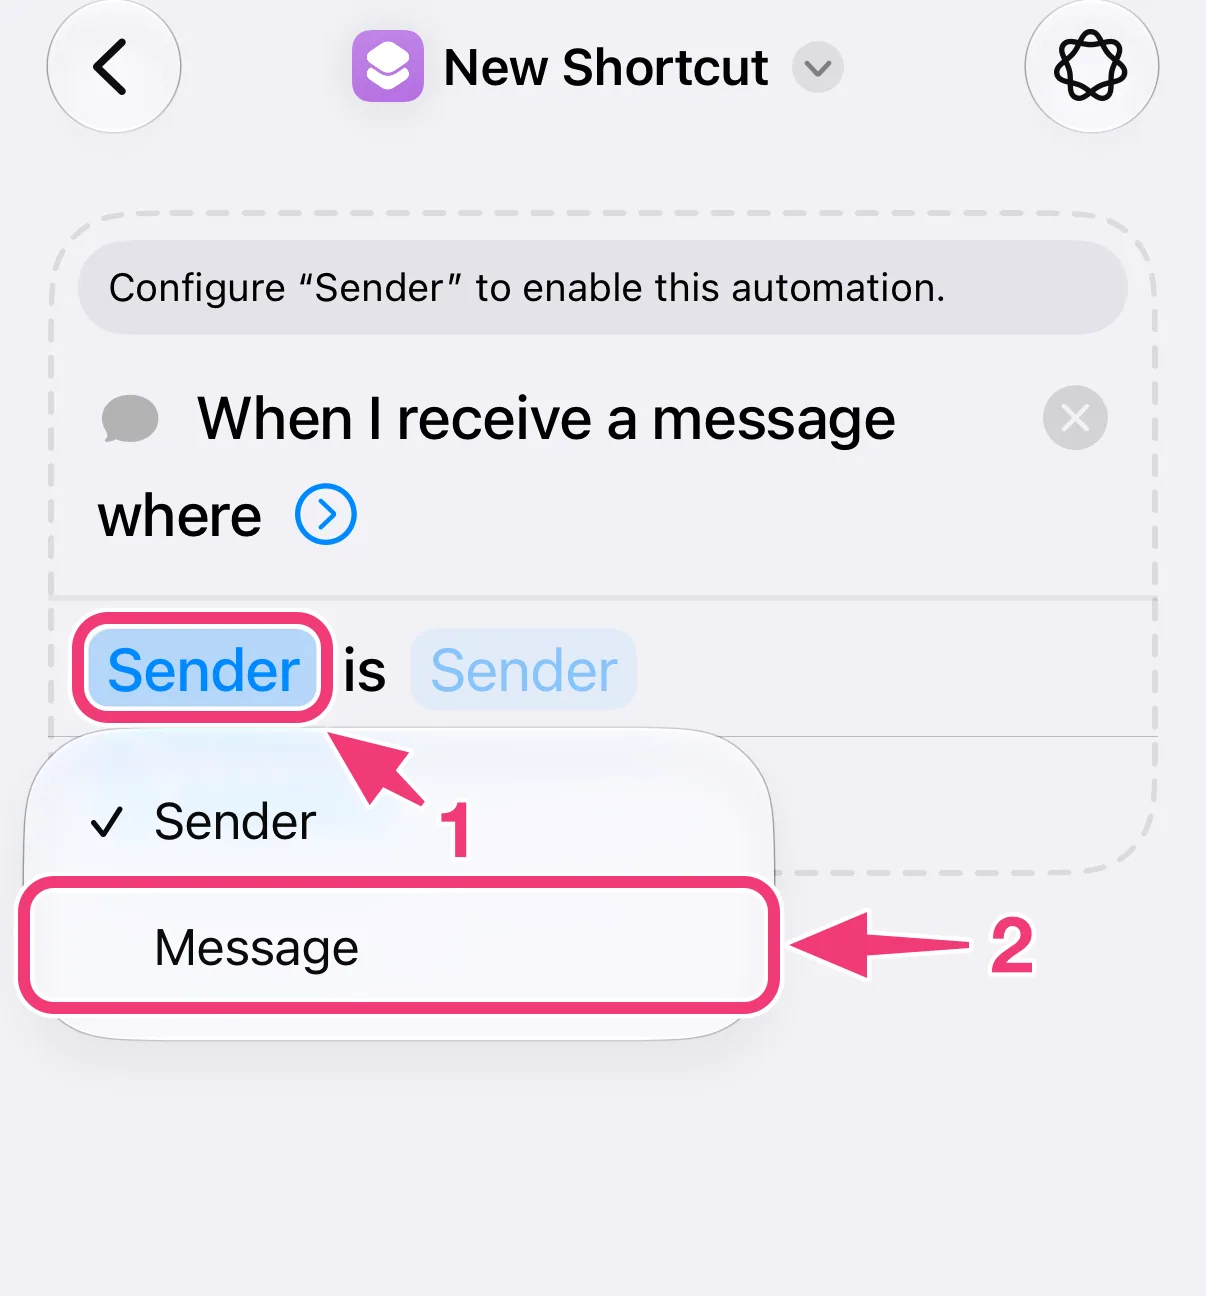
A new trigger starts out as "Sender is Sender" and needs a condition before the automation can run. To forward all of your texts:
- Tap "Sender" and switch it to "Message".
- Tap the empty field after "contains", enter a single space and tap ✓. Every text contains a space, so every text is forwarded.
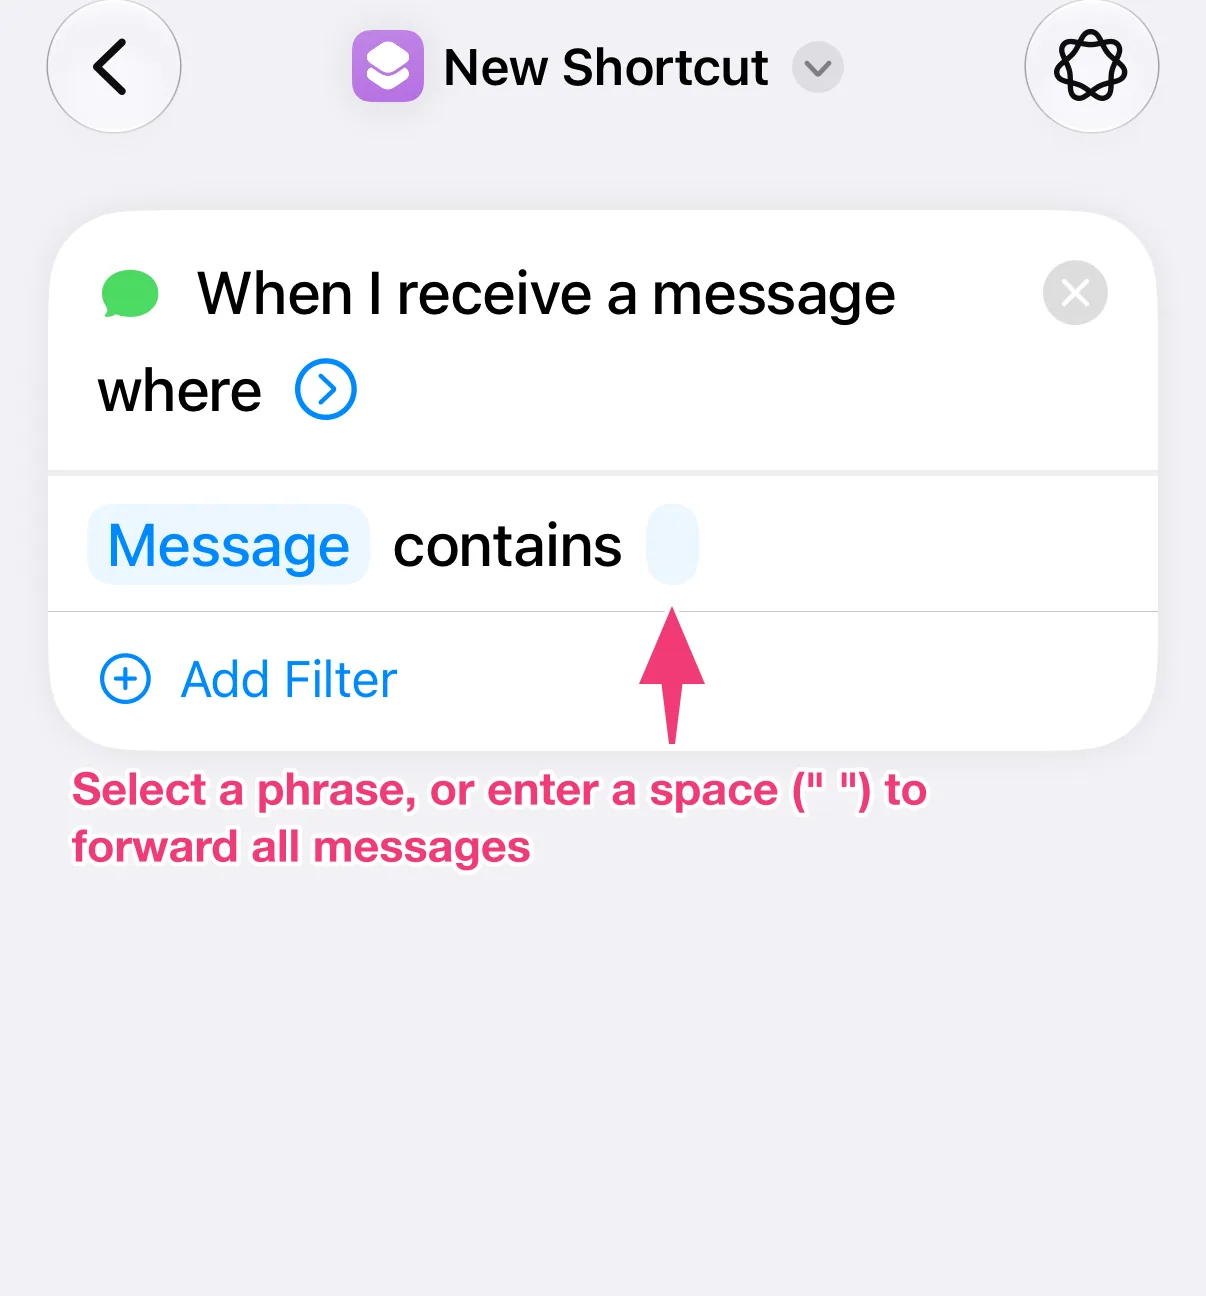
To forward only certain texts, enter a word or phrase they contain instead of the space — "code", for example, for login codes. To forward only the texts of one sender, leave "Sender" as it is and pick the contact or number in the field next to it.
5. Add "Forward as email"
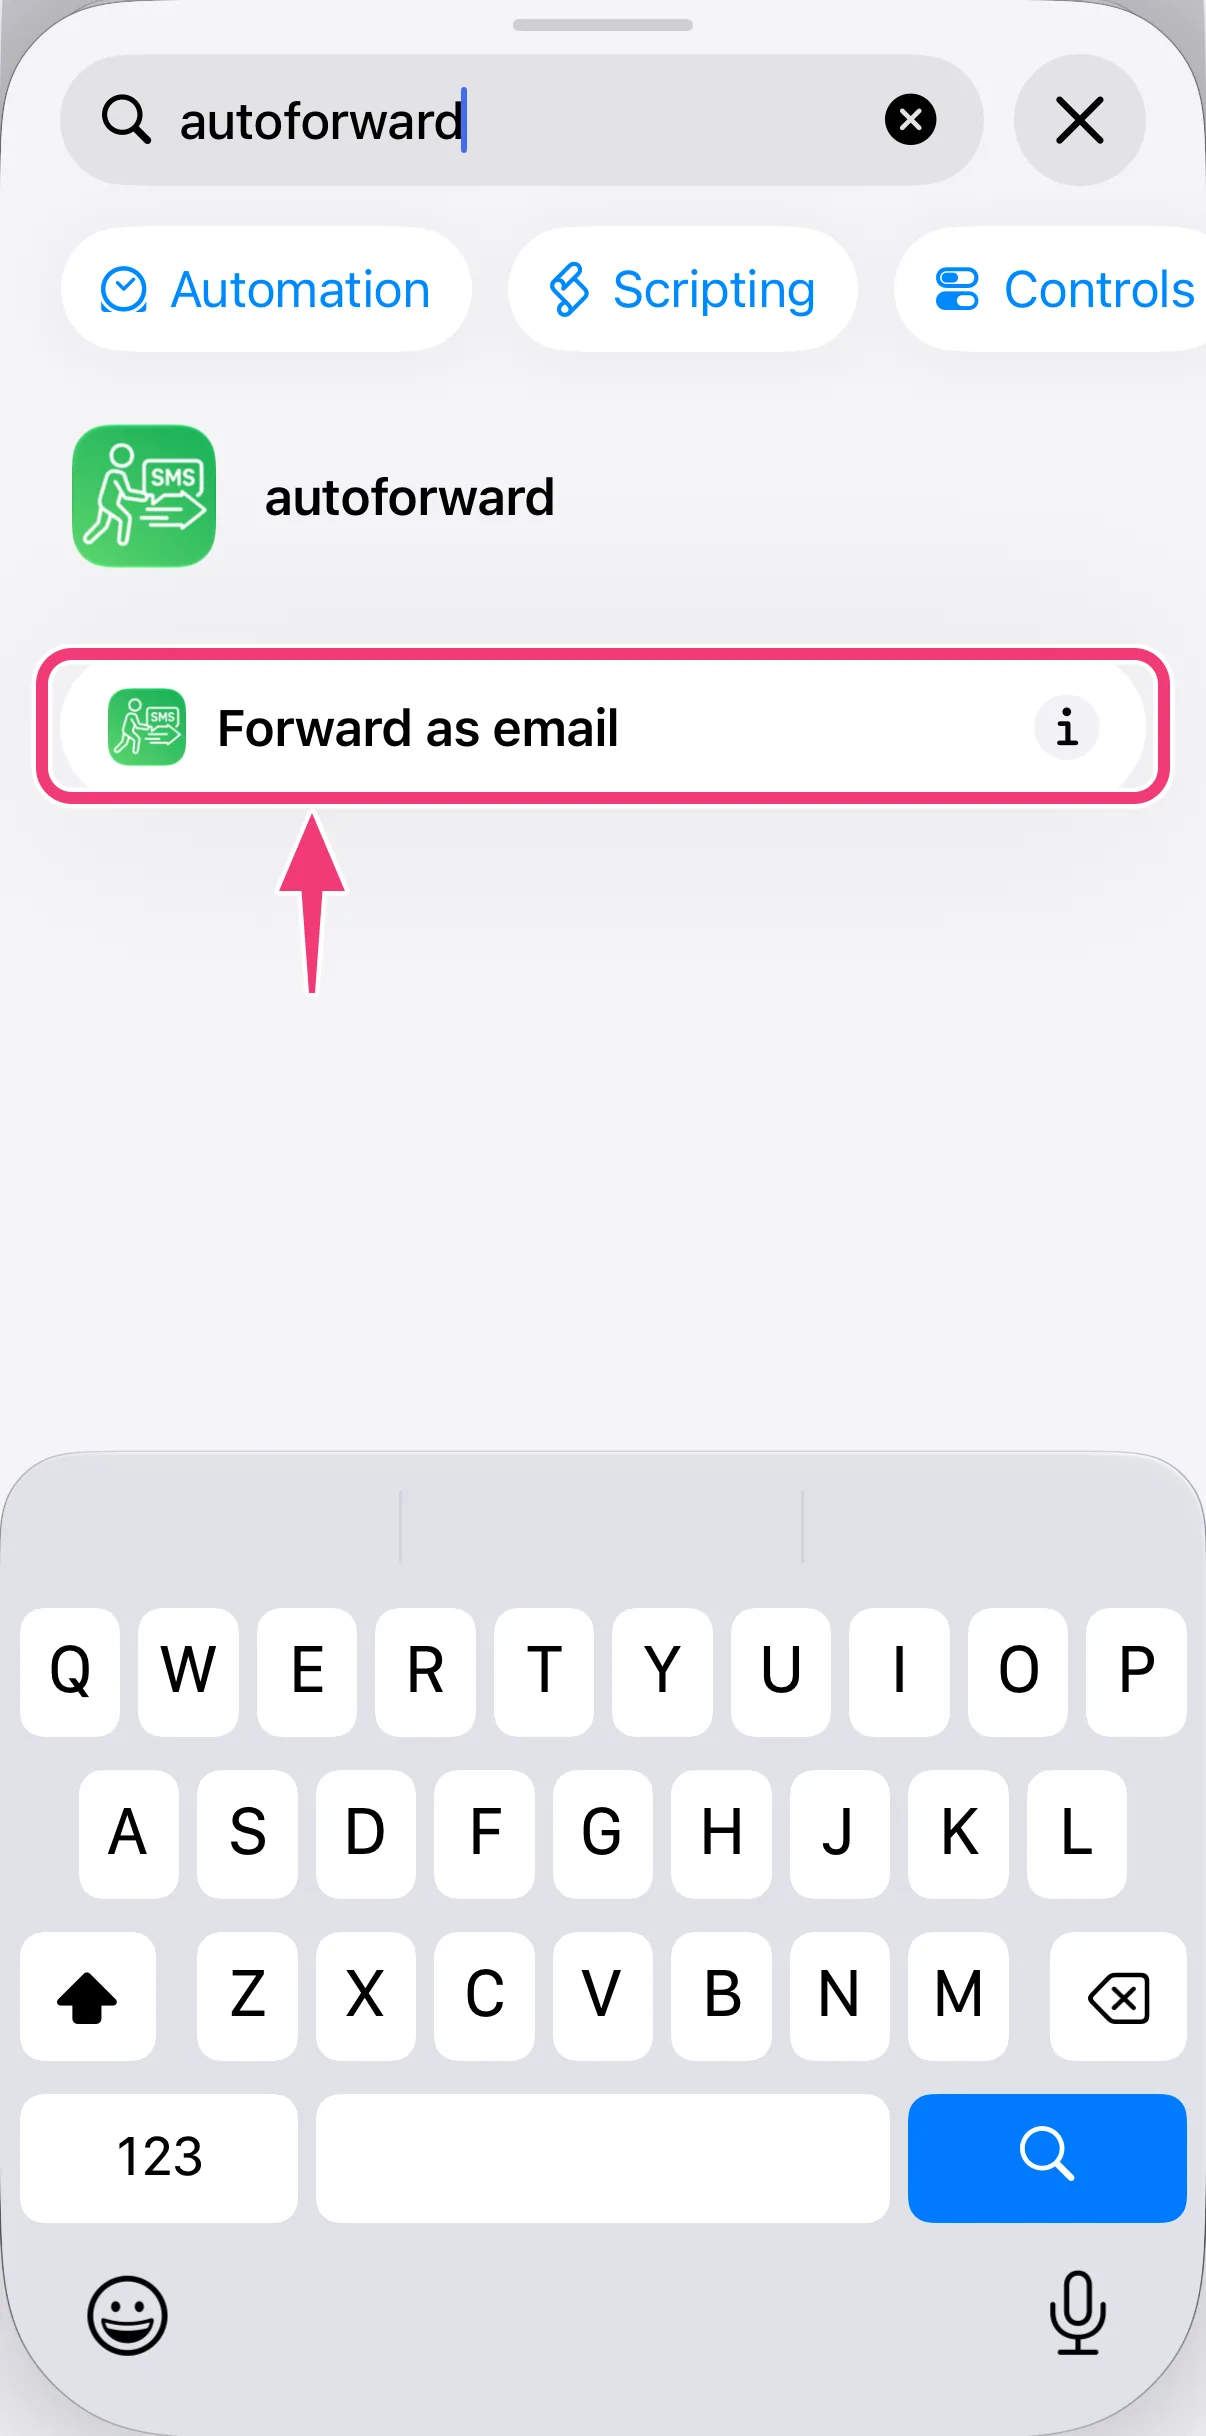
Tap "Search" at the bottom, type "autoforward" and select "Forward as email".
6. Insert the Message
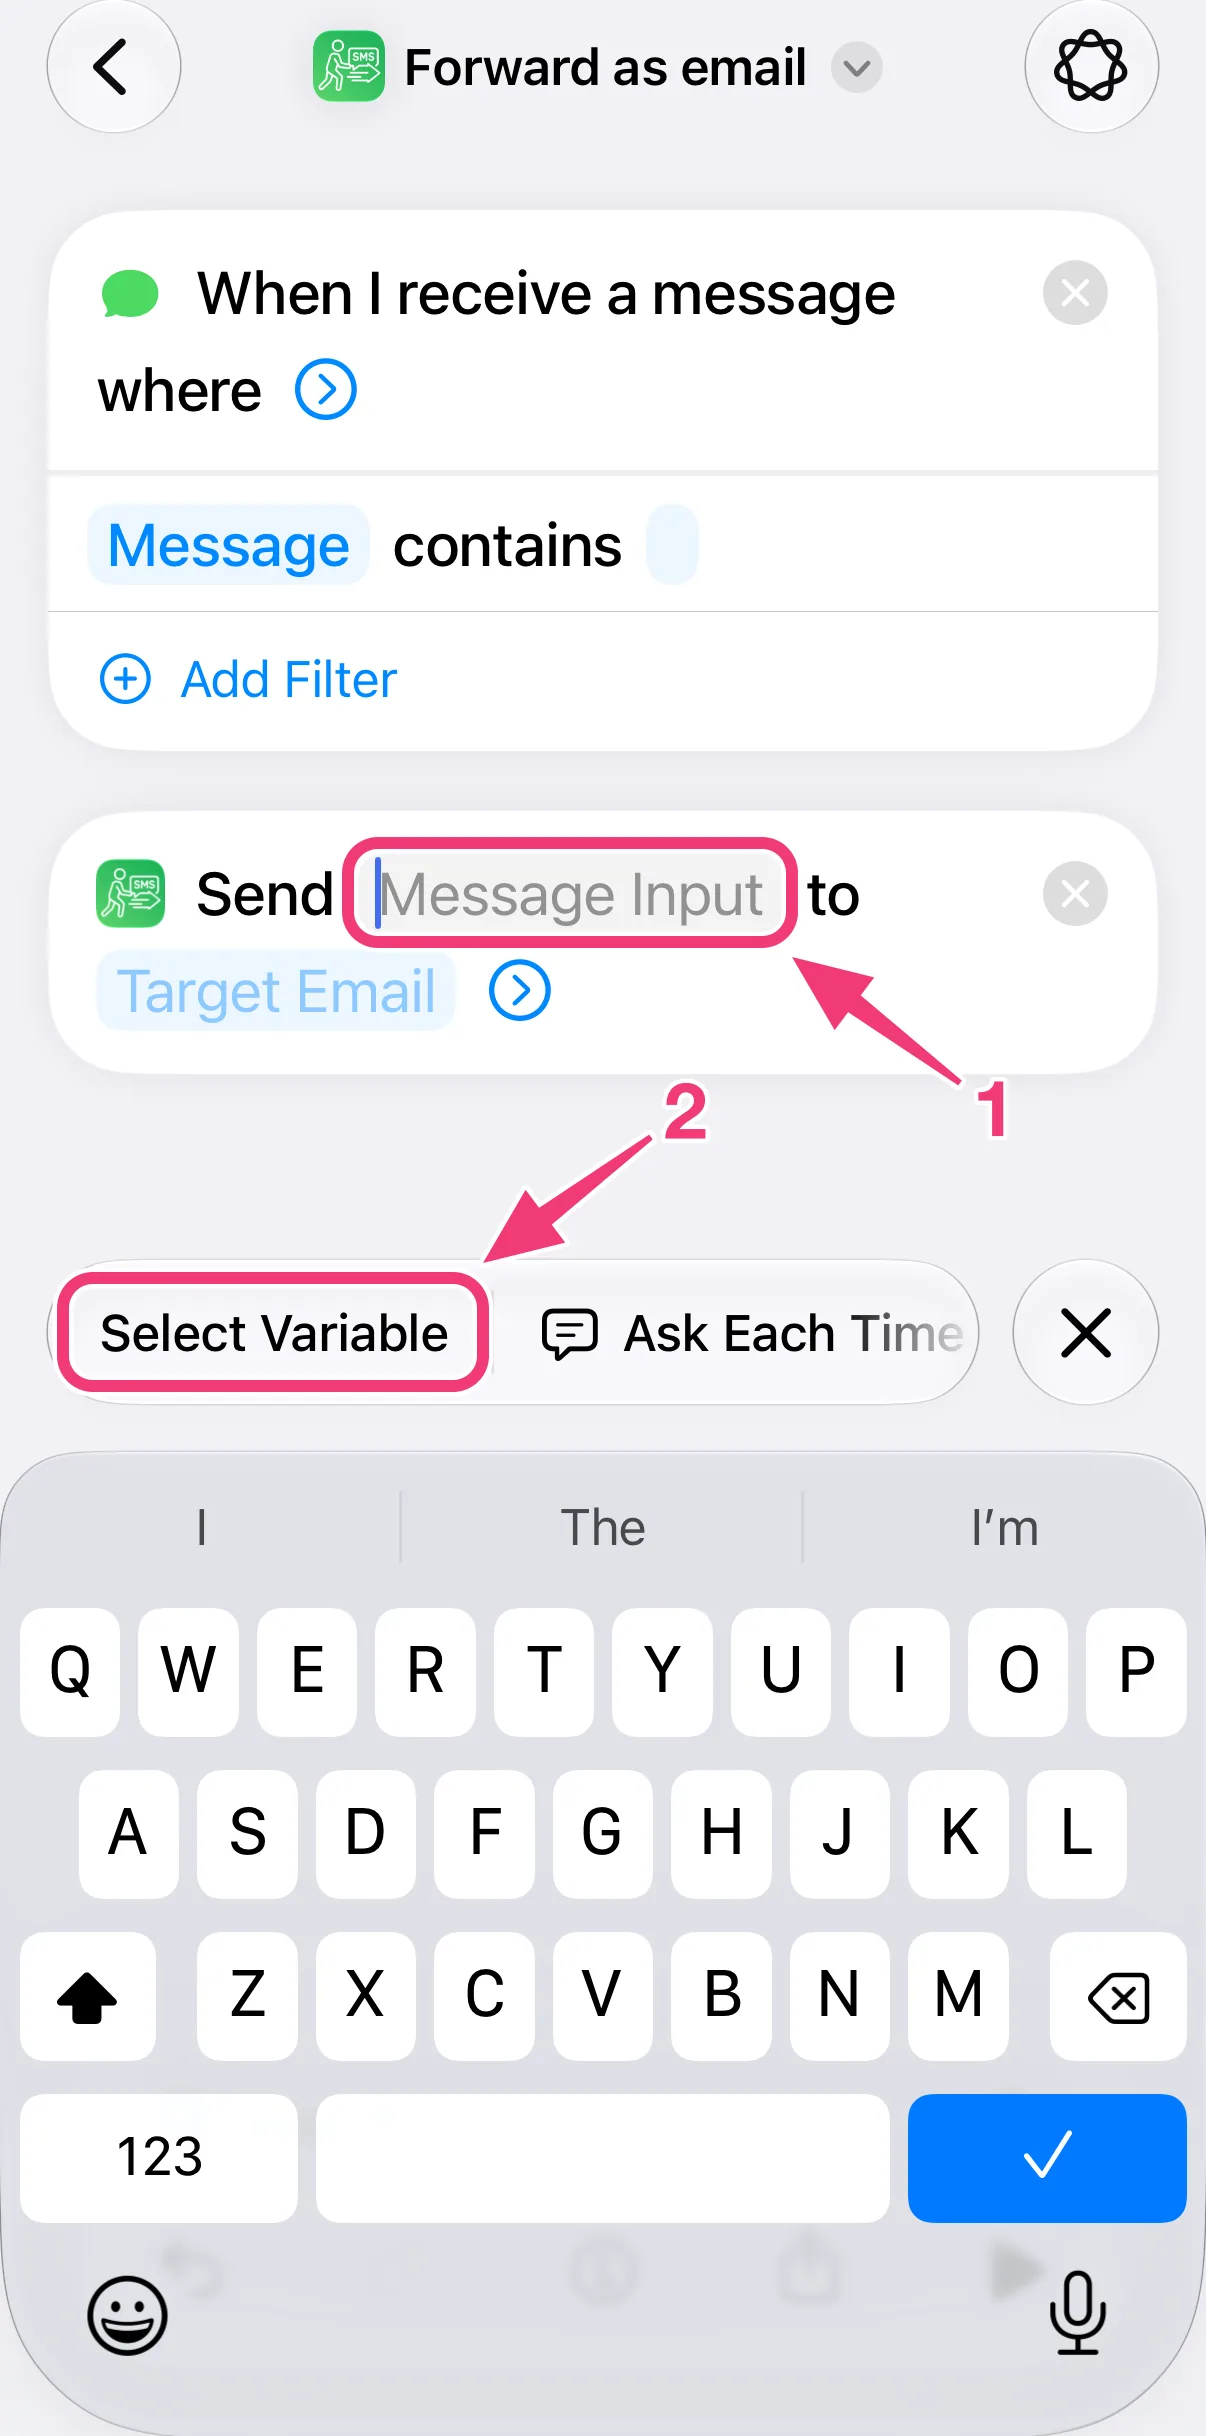
- Tap "Message Input" in the action.
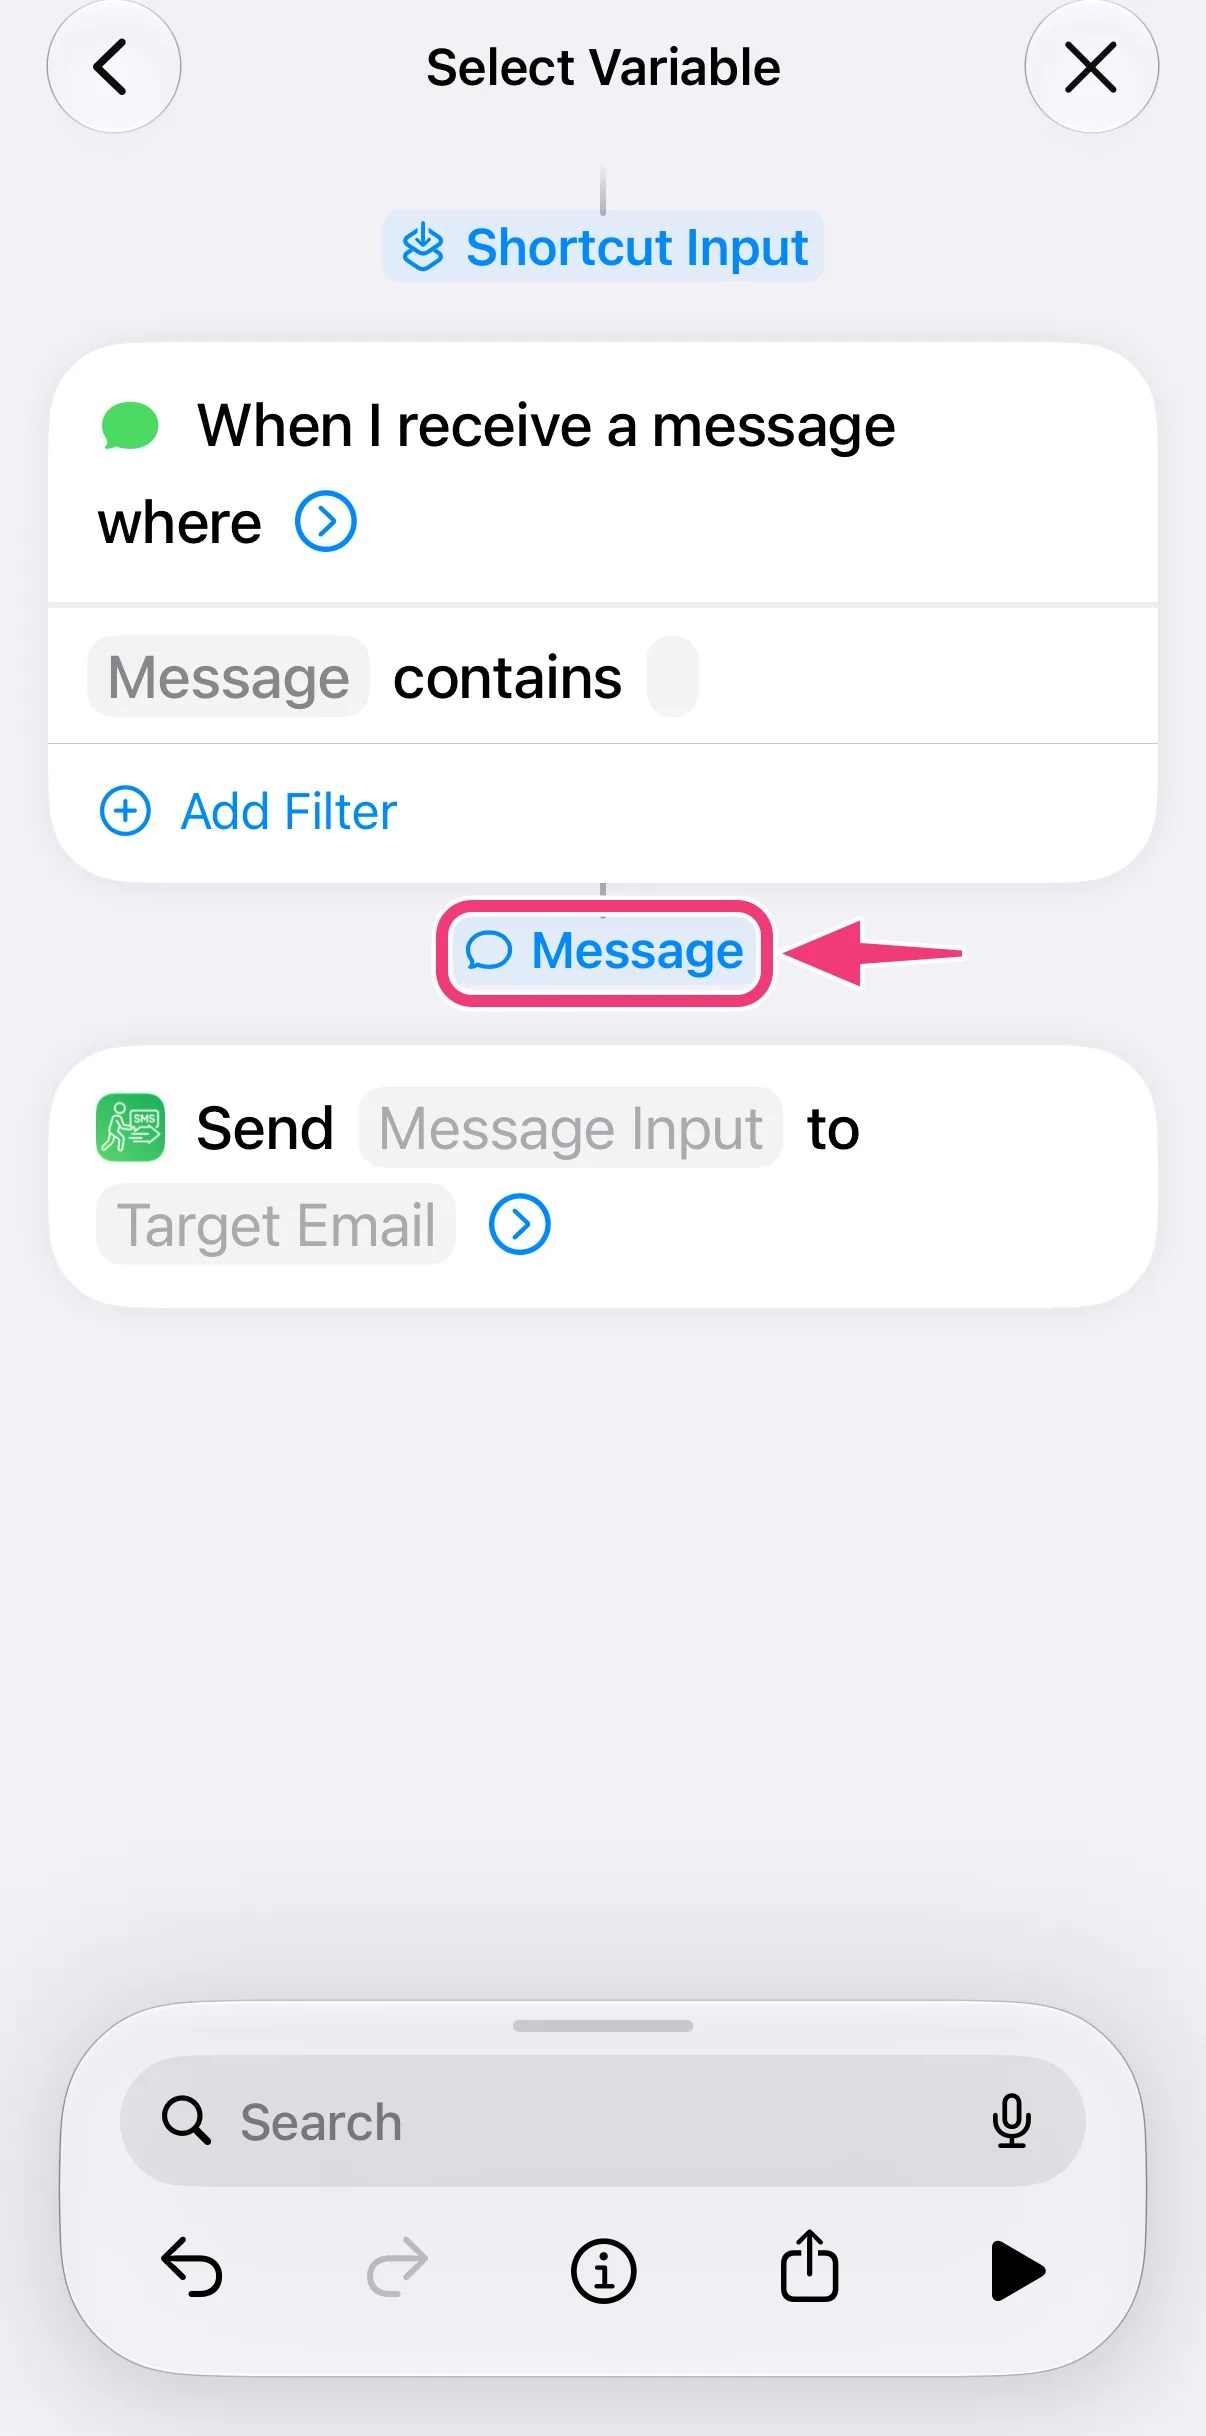
- Tap "Select Variable" above the keyboard.
- Tap "Message" right below the trigger.
7. Enter Your Email Address
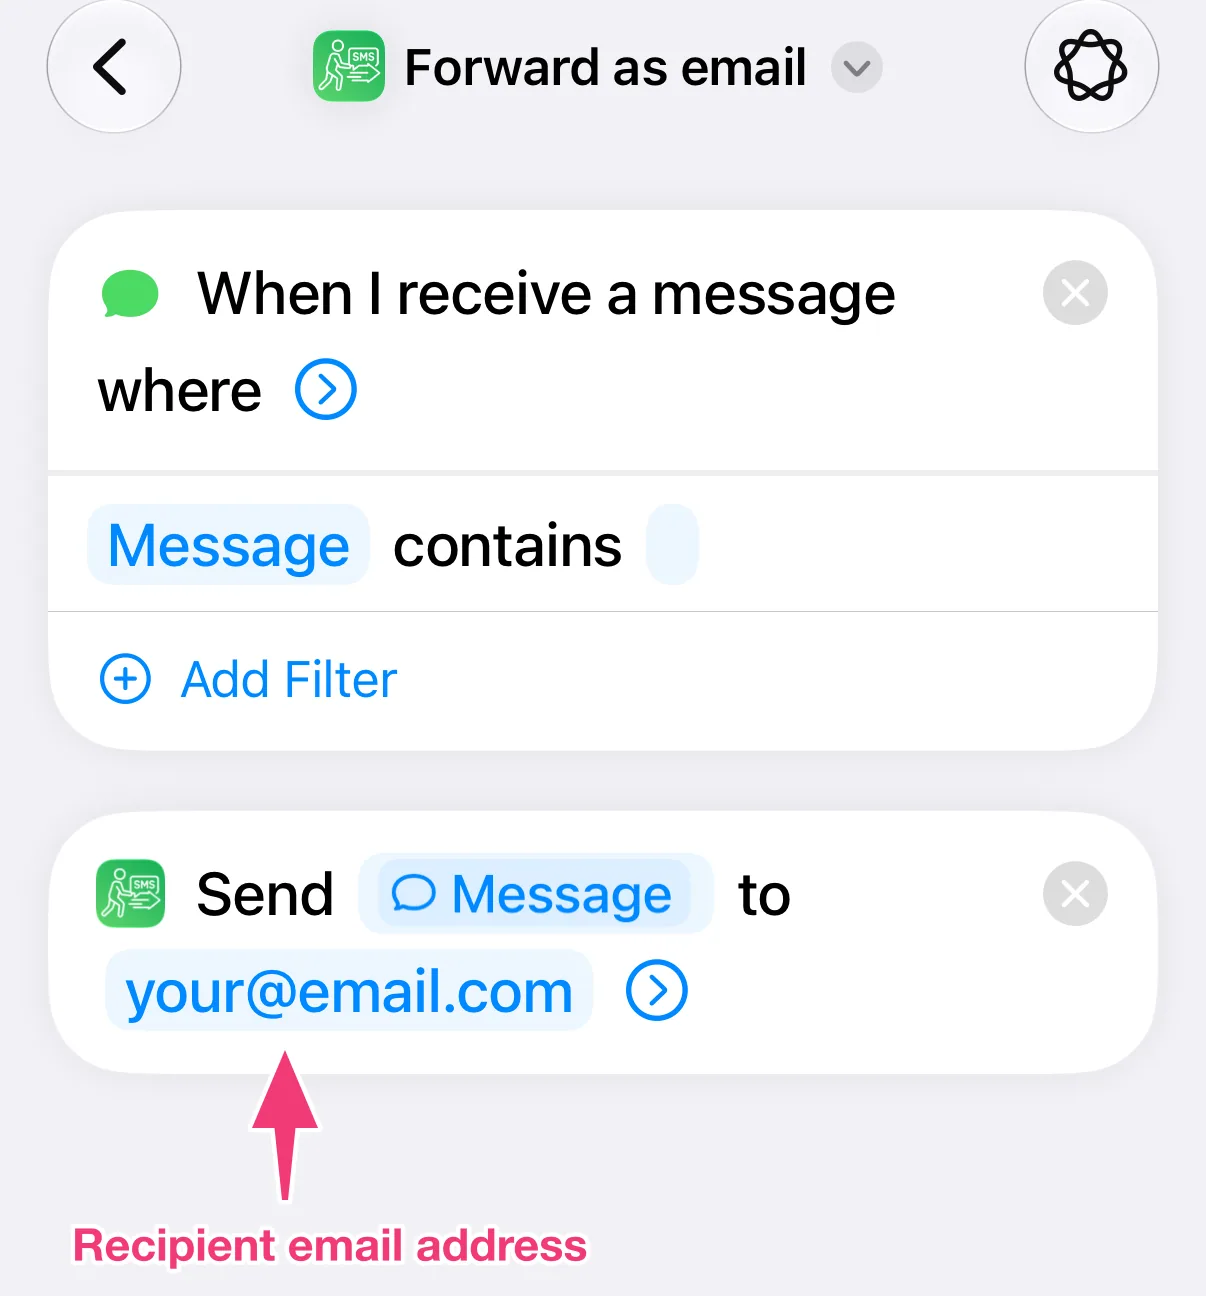
Tap "Target Email", enter the email address you want to forward your texts to and tap ✓.
8. Optional: Put the Sender in the Subject
With the sender in the subject, your mail app groups each sender's messages into one conversation.
- Tap the arrow next to the email address. This shows the action's other options.
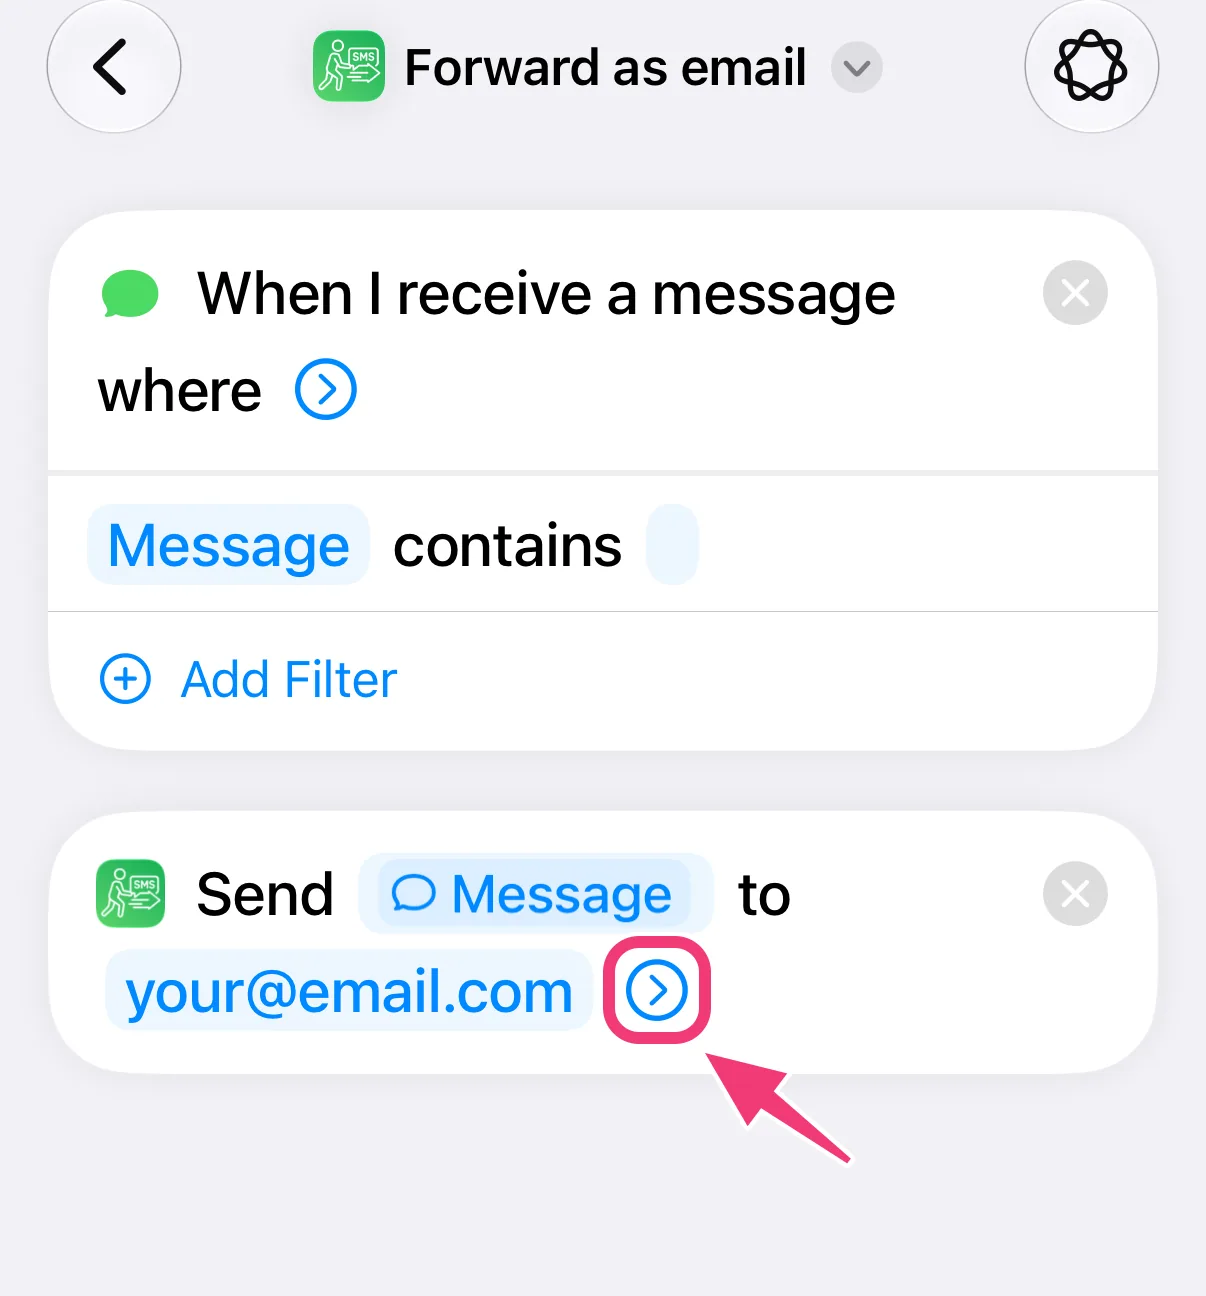
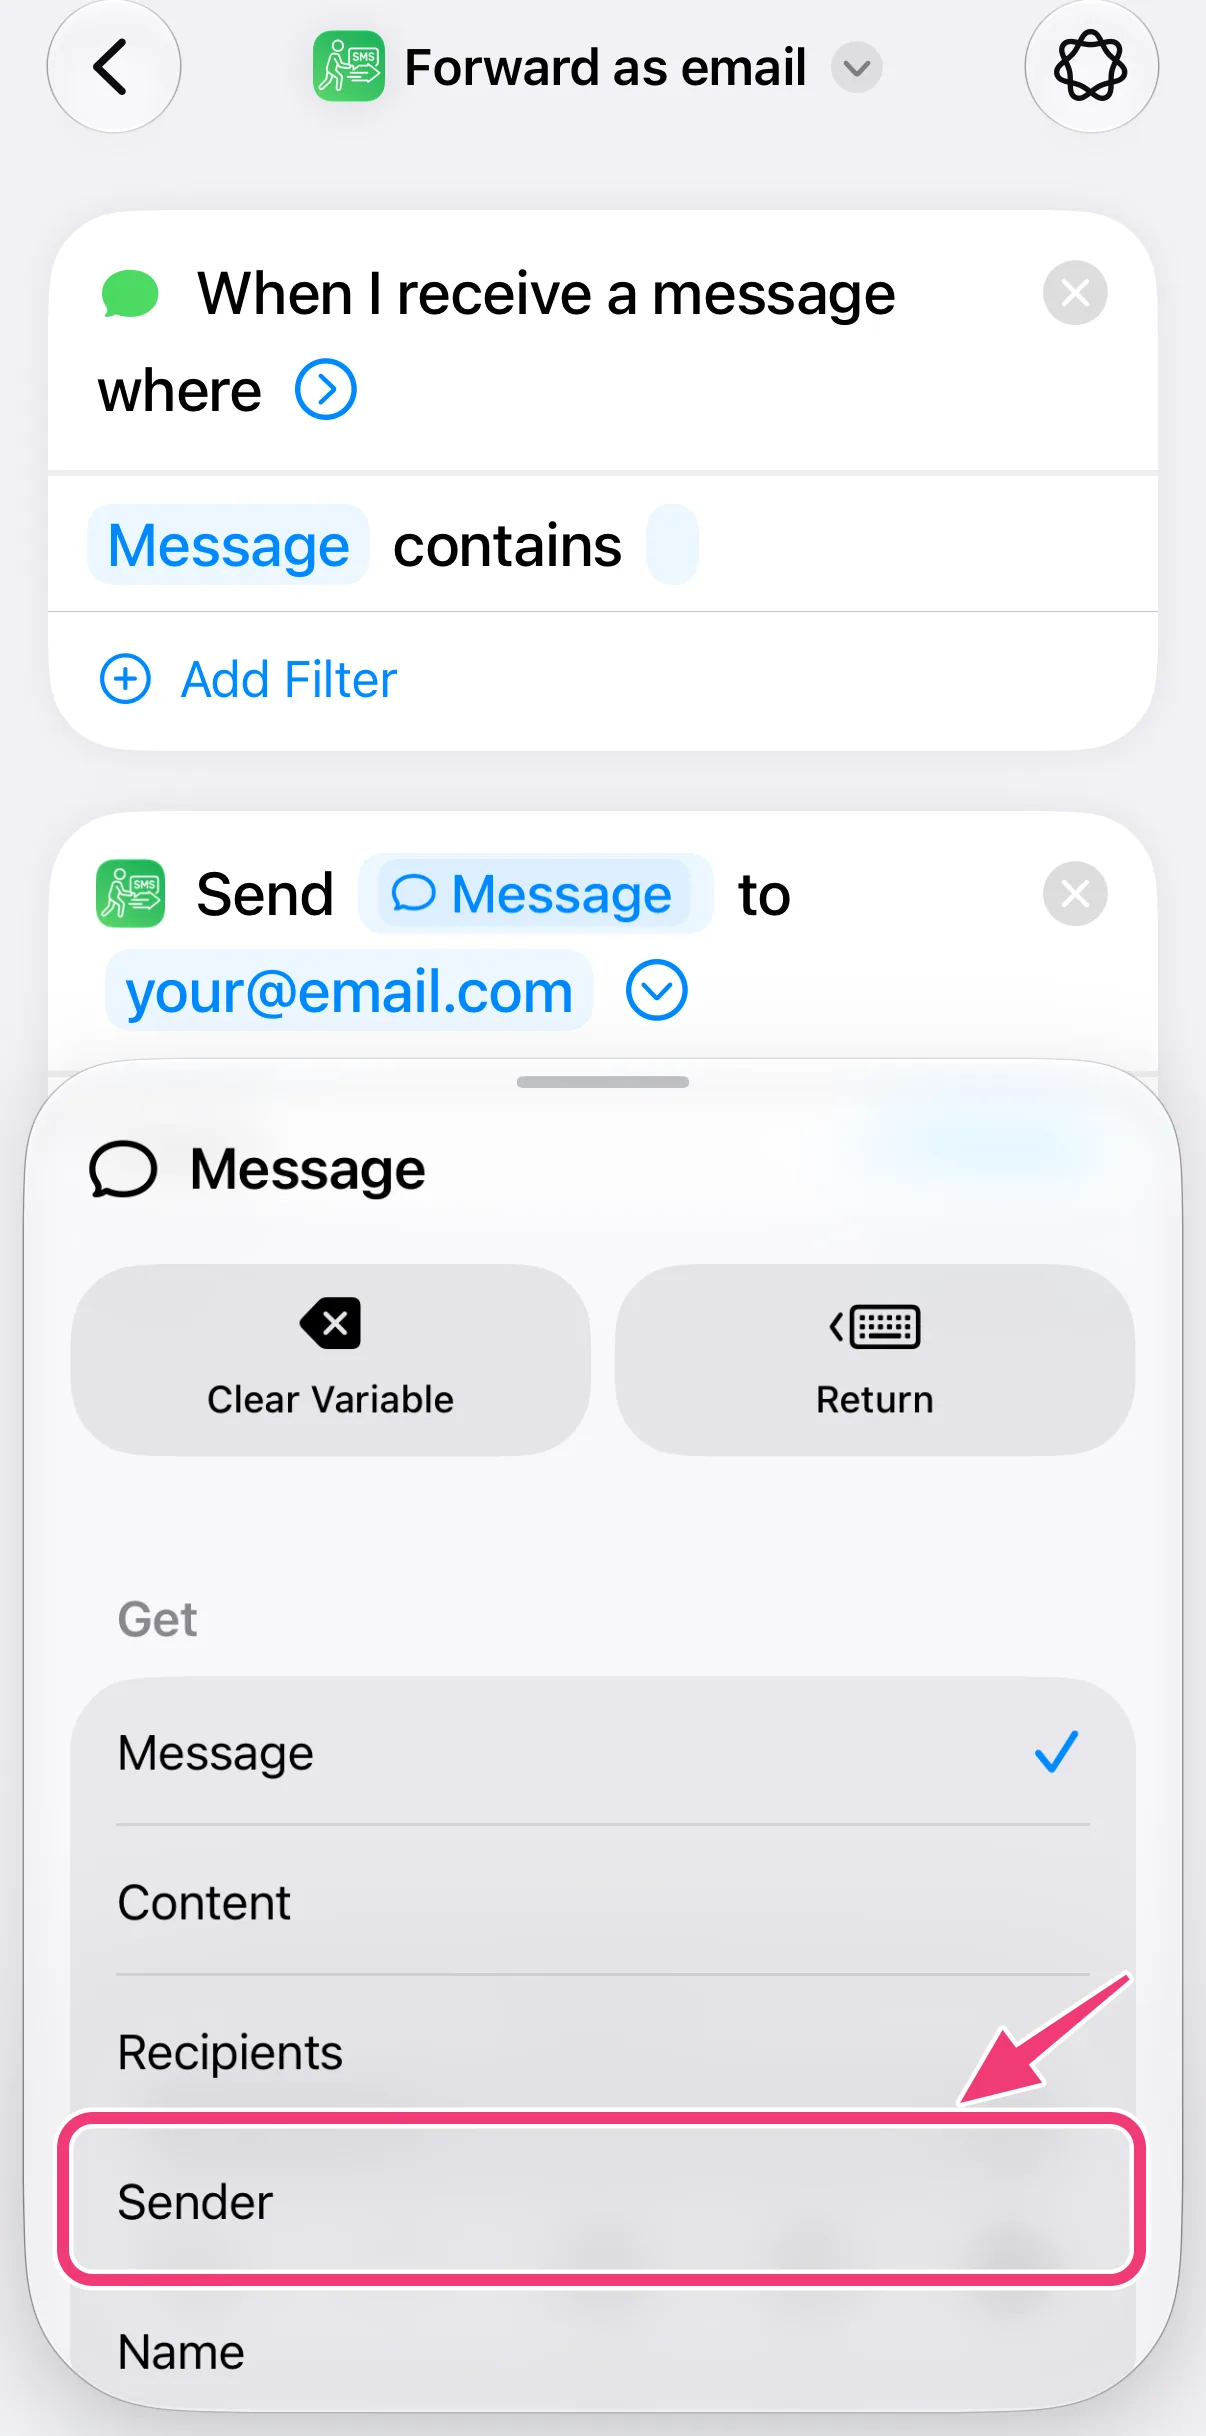
- Tap the "Sender" field, then "Select Variable" and "Message", as in step 6.
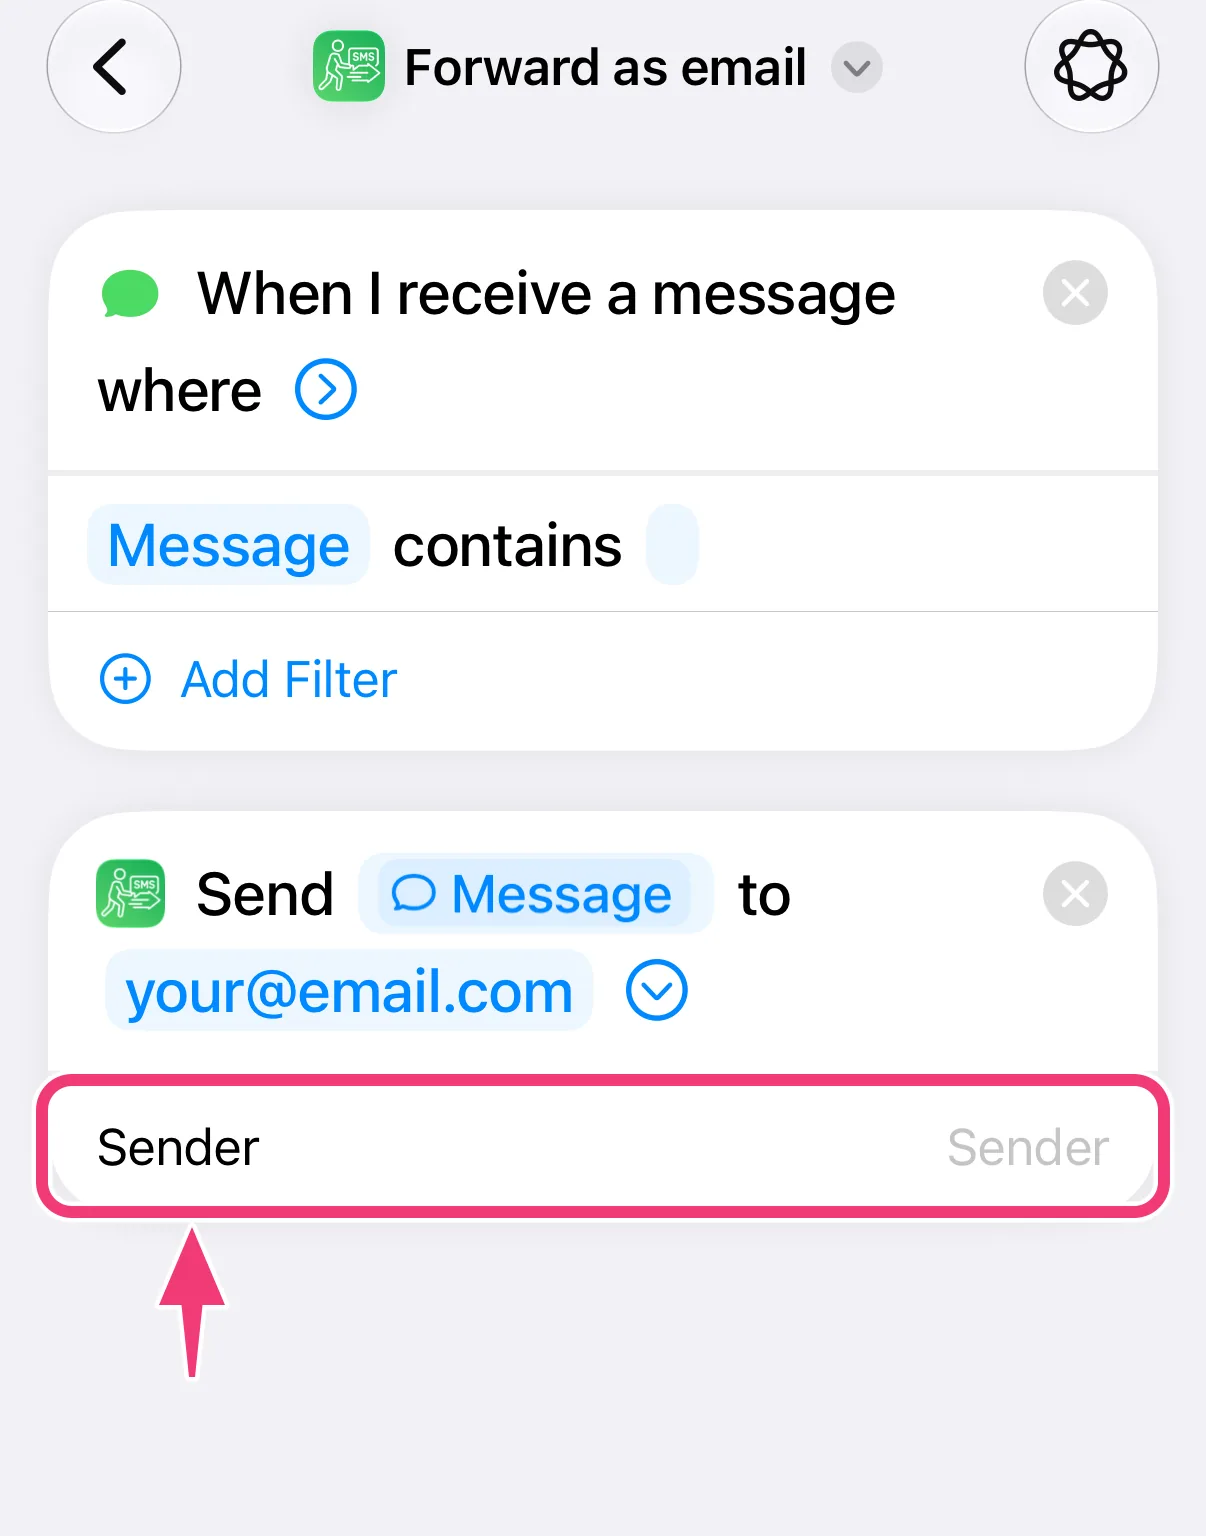
- Tap the "Message" you just inserted and select "Sender".
9. Save the Automation
Tap the back arrow at the top left. There is no "Done" button: leaving the editor saves the automation.
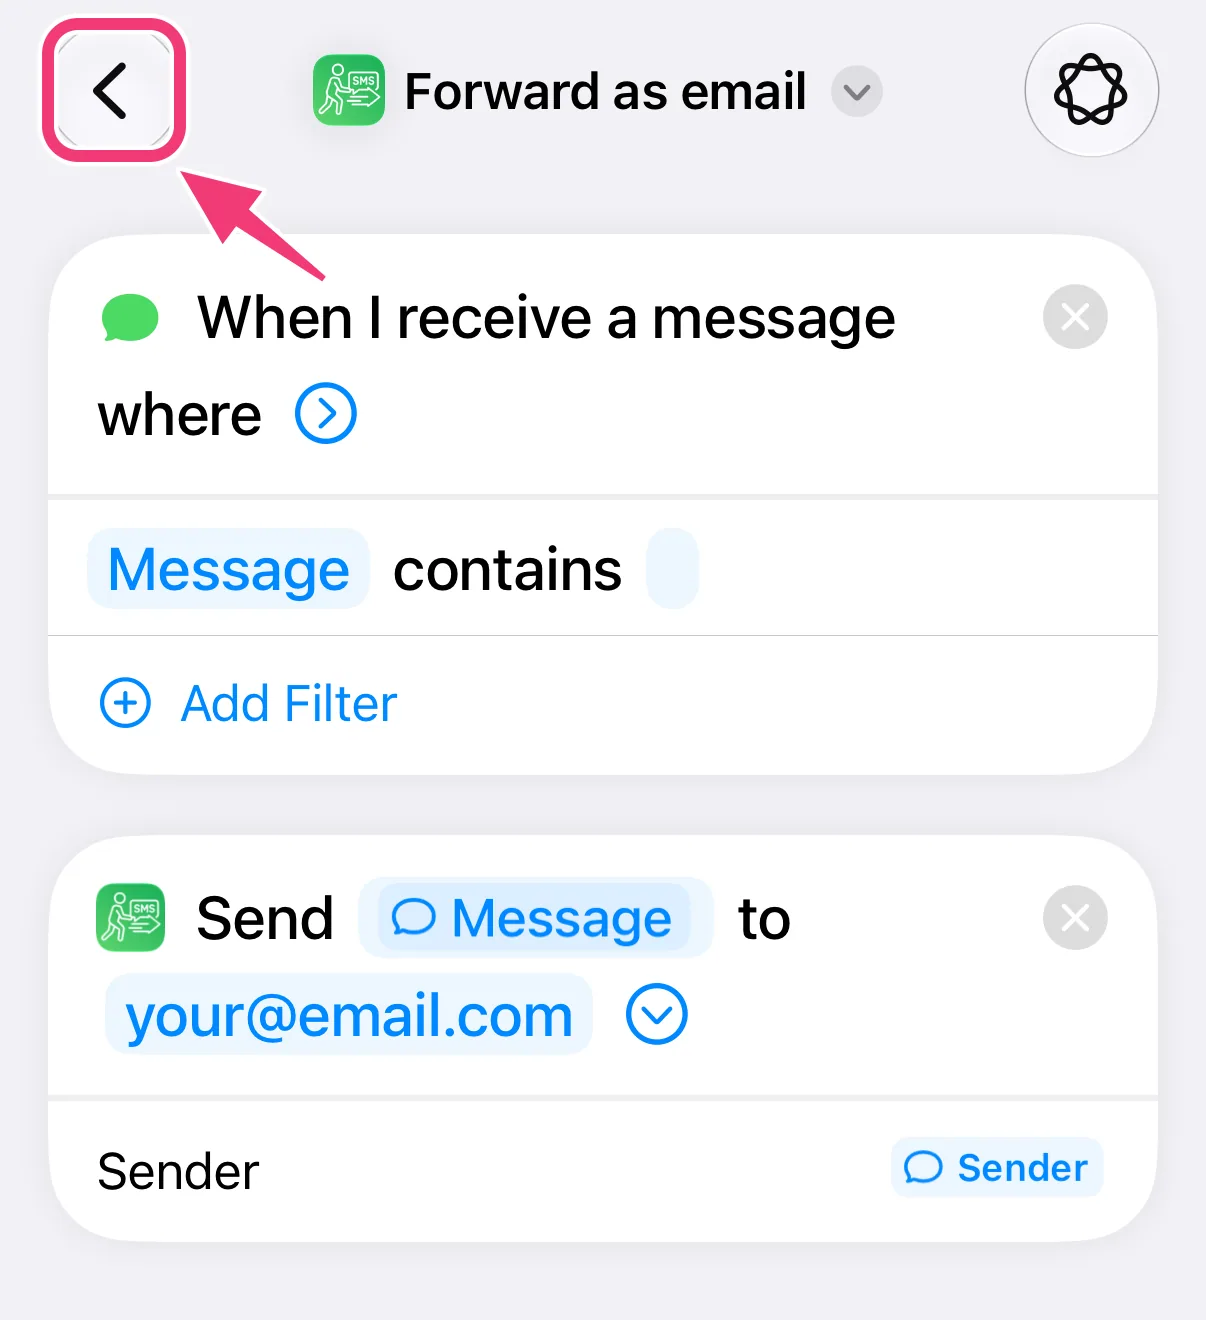
Your texts will now be forwarded!
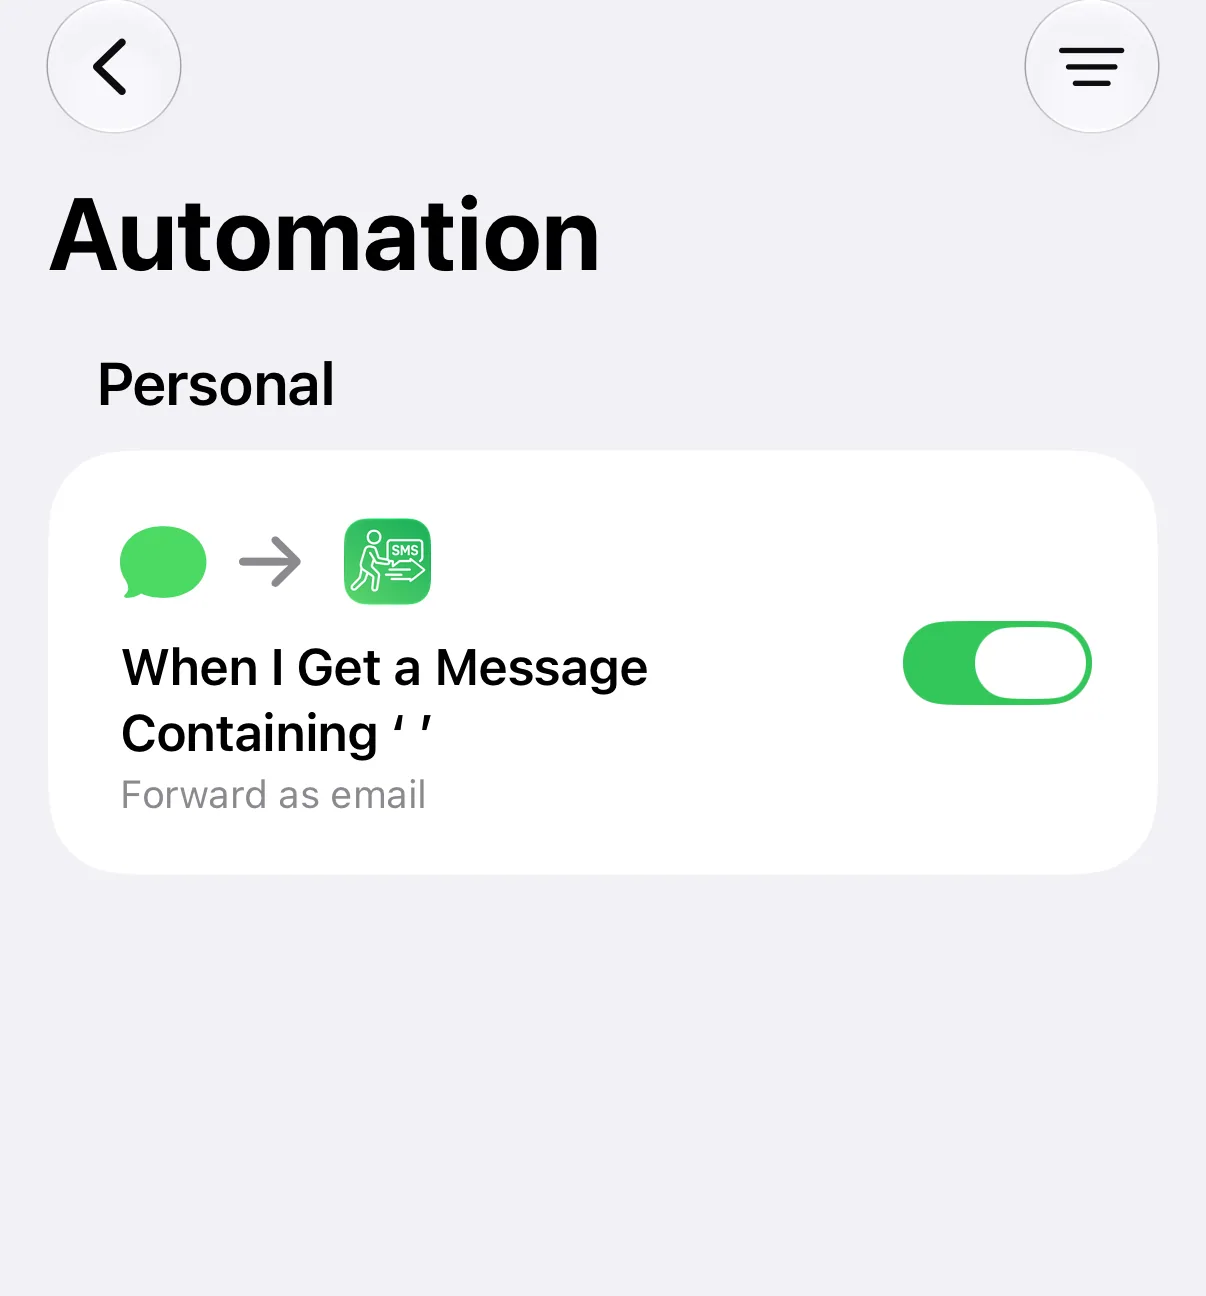
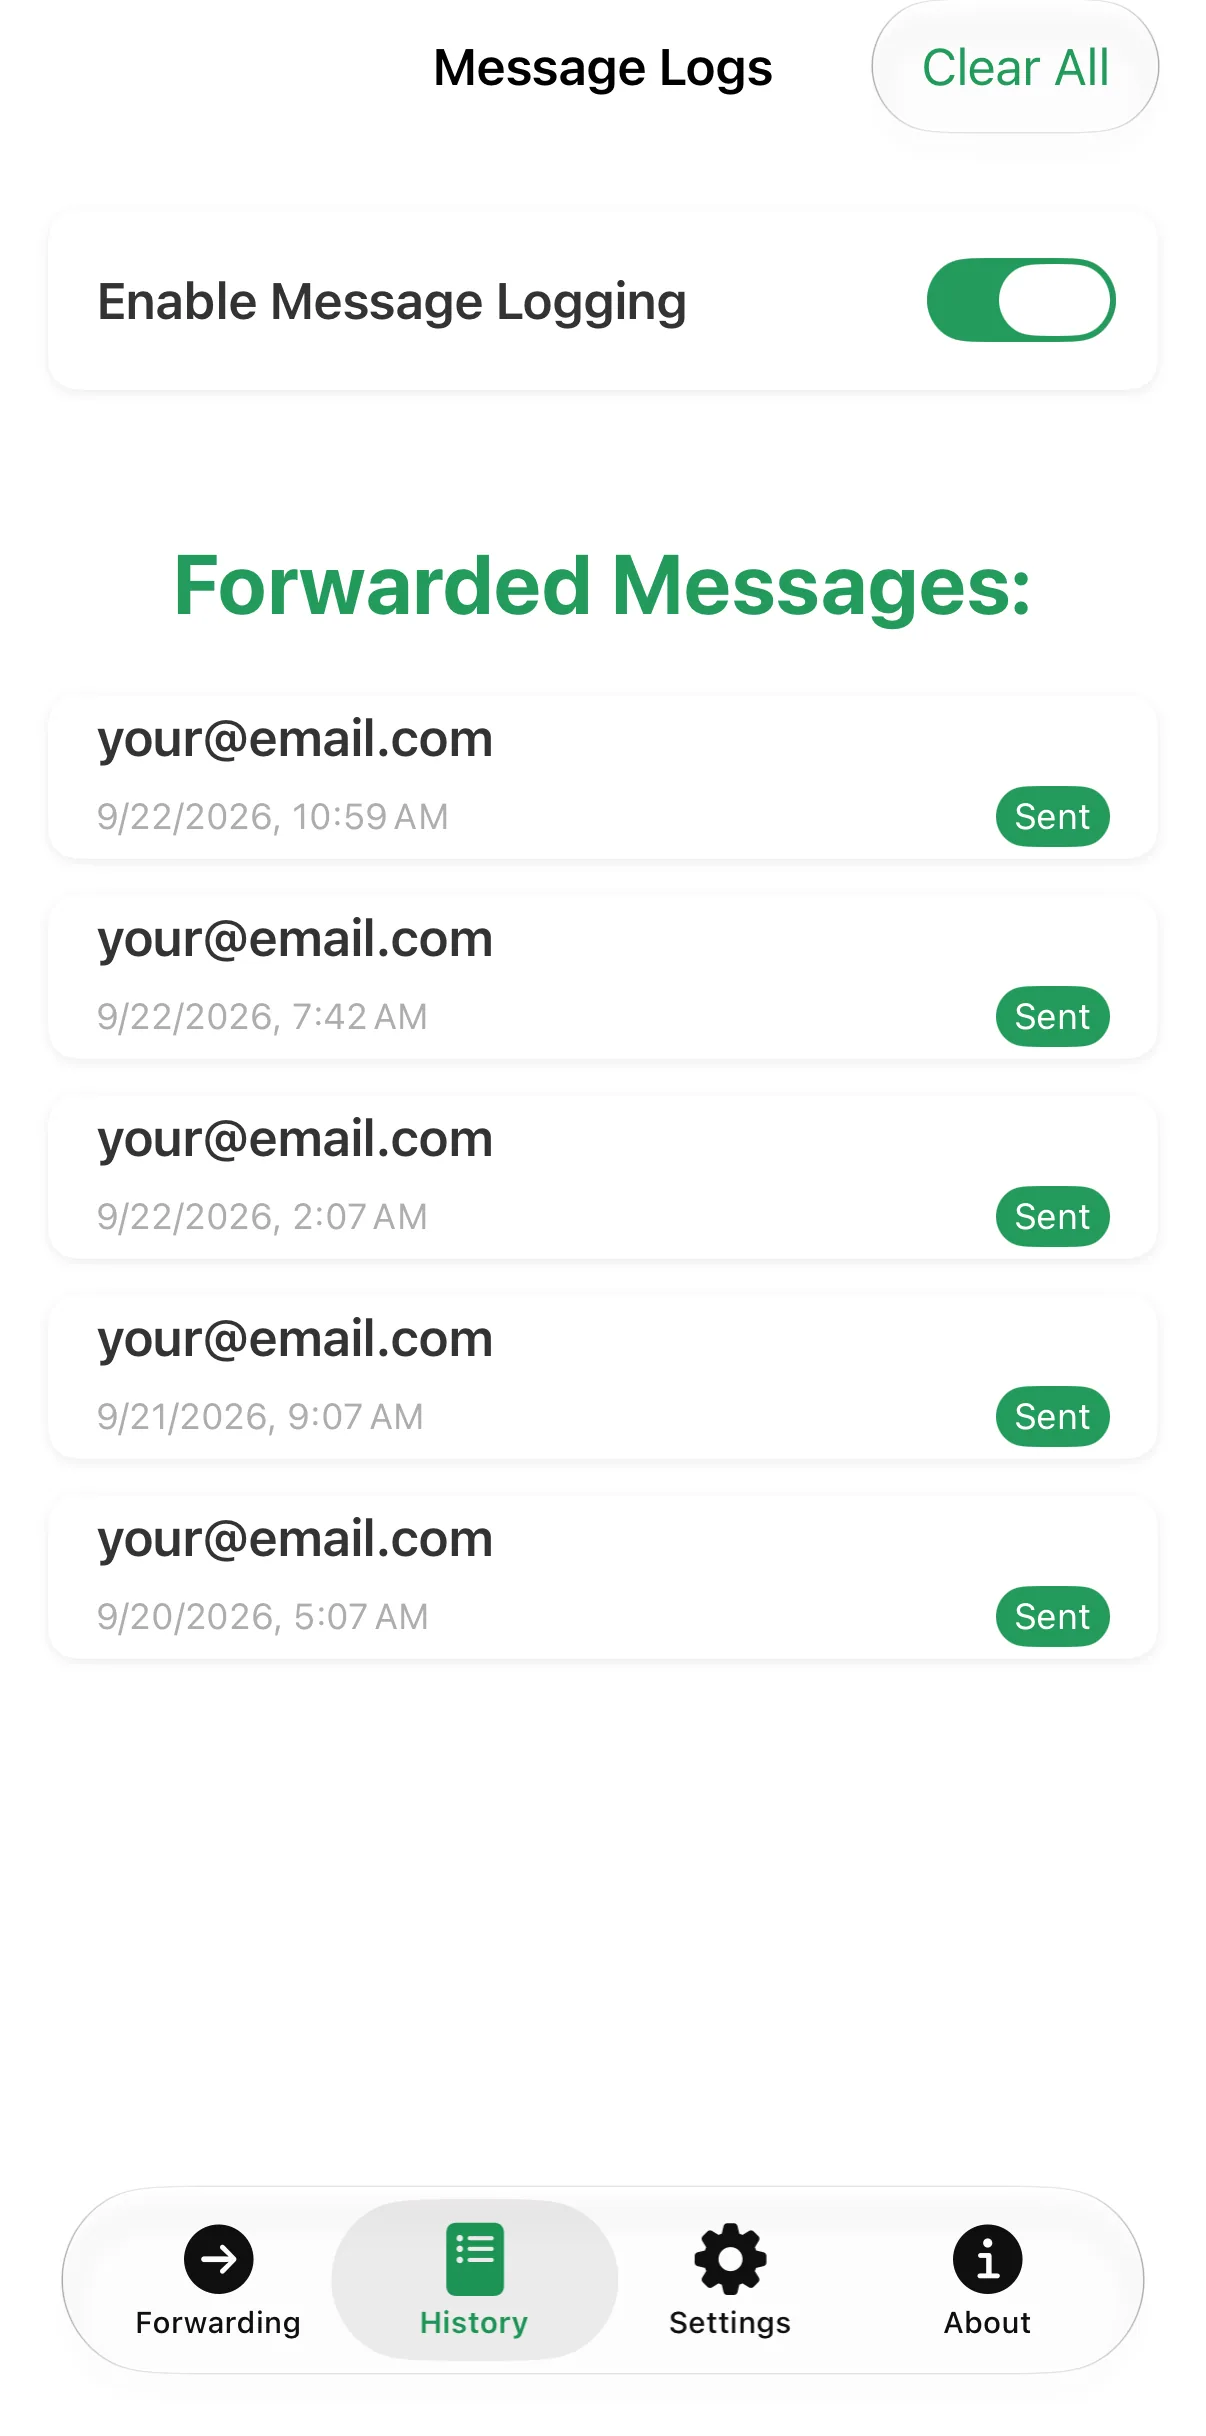
10. View Your Forwarding History
In the autoforward app, the "History" tab lists every forwarded text with its recipient, time and delivery status — never the message itself.